
Models with air conditioning
- Make
- Rover
- Model
- 600 Repair Manual Supplement
- Year
- 1993–1999
- Section
- Repairs › Models with air conditioning
Engine - L SeriesModels with air conditioning
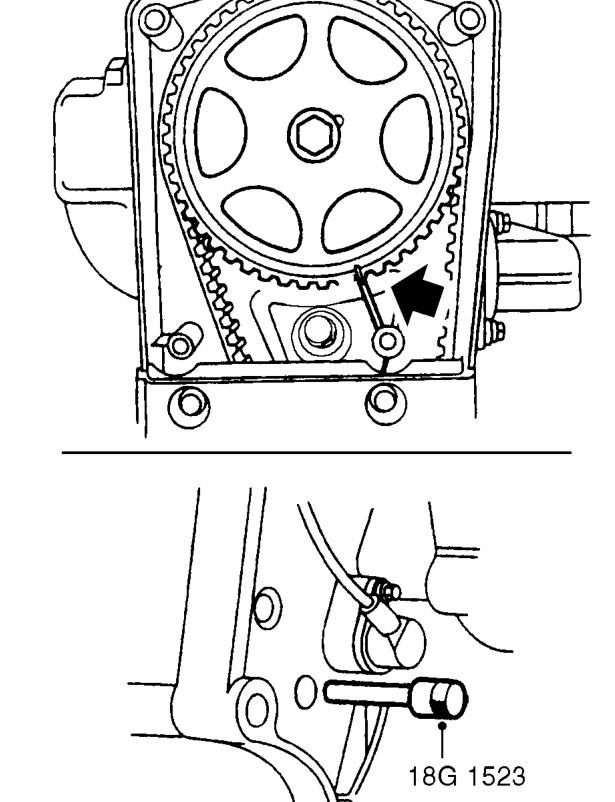
- Rotate crankshaft 2 complete turns clockwise and fit timing pin 18G 1523.
CAUTION: Ensure pin is fully inserted in flywheel, do not use camshaft gear, gear retaining bolt or timing belt to rotate crankshaft.
- Check that camshaft gear timing mark is aligned with mark on back cover.
- Insert locking pin 18G 1717 through injection pump drive gear and into hole in mounting plate.
CAUTION: To ensure that injection pump timing is correct, locking pin must be a sliding fit. If pin is a tight fit, drive belt adjustment procedure must be repeated.
- On completion, remove timing pin 18G 1523 and locking pin 18G 1717.
- Fit fuel injection pump timing belt cover. See this section.
- Fit camshaft timing belt upper front cover. See this section.
Models with air conditioning
- Align air conditioning pipe clip and fit bolt.
All models
- Fit auxiliary drive belt. See ELECTRICAL, Adjustments.
- Fit engine acoustic cover. See BODY, Exterior fittings.
Parts & tools for this job For 1993 Rover 600
- TOOLA/C manifold gauge setSearch: AC manifold gauge set
- TOOLUV leak detection kitSearch: AC UV leak detection kit
- PARTCabin filterSearch: Rover 600 1993 cabin filter
Links open Amazon search results in a new tab. As an Amazon Associate I earn from qualifying purchases.