
Front bodyside trim casing
- Make
- Land Rover
- Model
- Discovery Body Repair Manual
- Year
- 1995 on
- Section
- Repair › Front bodyside trim casing
Chassis and bodyFront bodyside trim casing
FRONT BODYSIDE TRIM CASING
Service repair no - 76.13.01
Remove
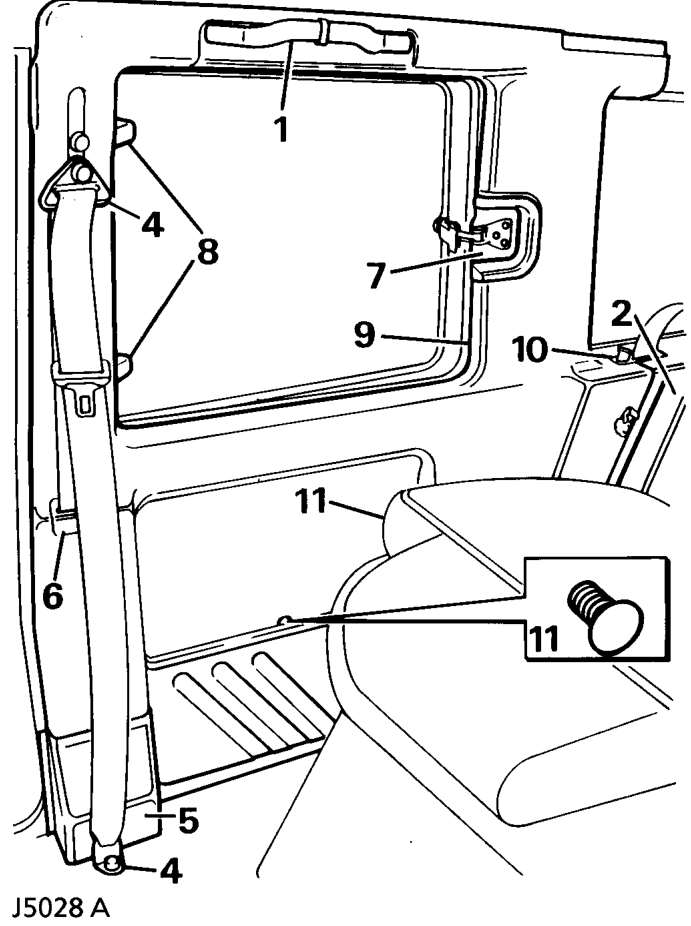
- Remove the grab handle.
- Remove the rear compartment lower trim panel. See this section.
- Remove the alpine light trim casing. See this section.
- Remove the bolts securing the upper and lower seat belt mountings.
- Remove the finisher from its location over the seat belt inertia reel.
- Remove the front seat belt guide from the upper aperture in the casing.
- Open the side window, remove the catch securing screws and withdraw the catch trim.
- Remove the side window hinge finishers.
- Release the casing from the window rubber.
- Release the rear seat belt from the guide attached to the casing.
- Fold down the rear seats and carefully ease the casing from the fastenings.
- Pass the front seat belt through the upper aperture and withdraw the casing from the vehicle.
Refit
- Reverse removal procedure.
- Tighten upper and lower seat belt fixings to
- NOTE: Ensure that the trim material glued
- to the door post is not wrinkled when the
- door seal is fitted.
32
.
Nm (24 lbf ft)
Parts & tools for this job For 1995 Land Rover Discovery
- TOOLTrim removal tool kitSearch: trim removal tool kit
- PARTTouch-up paintSearch: Land Rover touch up paint
- PARTPanel clip assortmentSearch: Land Rover panel clips assortment
Links open Amazon search results in a new tab. As an Amazon Associate I earn from qualifying purchases.