
Rear side door - trim panel
- Make
- Land Rover
- Model
- Discovery Body Repair Manual
- Year
- 1995 on
- Section
- Repair › Rear side door - trim panel
Chassis and bodyRear side door - trim panel · page 1 of 3
REAR SIDE DOOR - TRIM PANEL
Service repair no - 76.34.04
Remove Refit
- Disconnect battery negative lead.
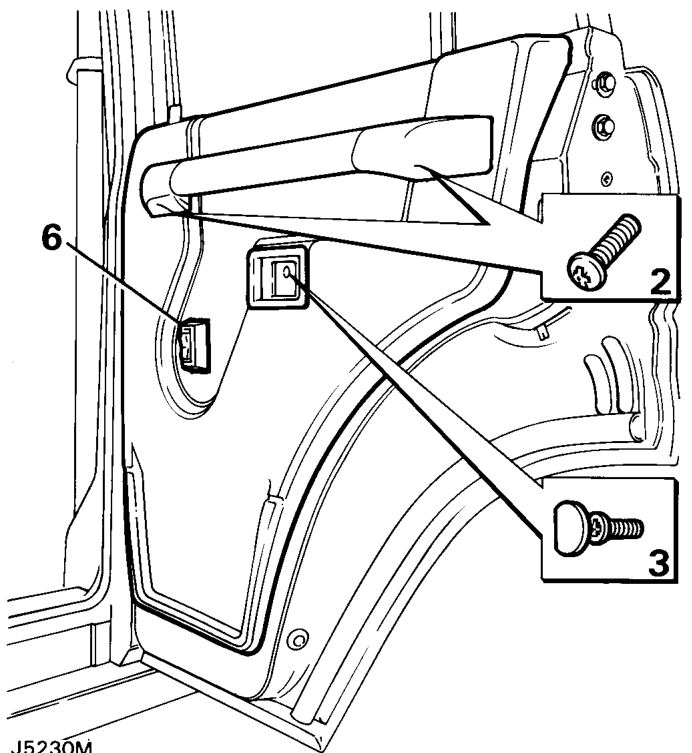
- Remove the two securing screws and detach the door pull from its mounting brackets.
- Remove the securing screw and detach the interior door release handle surround.
- Where applicable remove the window winder or release electric switch and disconnect.
- Detach the trim panel by inserting a trim panel removing tool between the trim panel and the inner door panel, gently prise out the plastic securing clips from their respective holes in the inner panel.
- Lift the trim panel over the remote button and clear of the door. Where applicable disconnect the electrical plug from the window lift switch and withdraw the panel.
- NOTE: With the trim panel removed the
- remote button and rod will fall from its
- location in the bellcrank. Observe its
- correct location and withdraw from the door
- panel.
- If a new trim panel is to be fitted, remove the window lift switch, door bin and remote button finisher from the existing trim panel and fit them to the new panel.
- Reverse removal procedure. Ensuring correct fitment of the sill button operating rod.
Parts & tools for this job For 1995 Land Rover Discovery
- TOOLTrim removal tool kitSearch: trim removal tool kit
- PARTTouch-up paintSearch: Land Rover touch up paint
- PARTPanel clip assortmentSearch: Land Rover panel clips assortment
Links open Amazon search results in a new tab. As an Amazon Associate I earn from qualifying purchases.