
Dim-dip resistor
- Make
- Rover
- Model
- 200 Workshop Manual
- Year
- 1995–1999
- Section
- Repairs › Dim-dip resistor
ElectricalDim-dip resistor
DIM-DIP RESISTOR
Service repair no - 86.55.92
Remove
- Models with front fog lights: Remove LH front fog light. See this section.
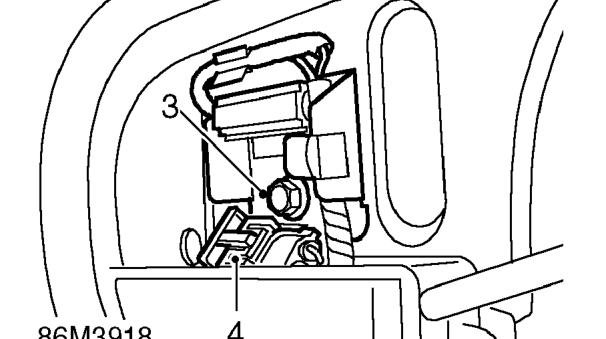
- Models without front fog lights: Remove bumper LH blanking plate.
- Remove bolt securing dim-dip resistor bracket to front valance.
- Withdraw resistor and bracket assembly through aperture in bumper and disconnect multiplug.
Refit
- Connect multiplug to dim-dip resistor.
- Feed resistor through aperture in bumper and position to front valance.
- Fit bolt securing resistor and bracket assembly to body and tighten to 8 Nm.
- Models without front fog lights: Fit bumper LH blanking plate.
- Models with front fog lights: Fit LH front fog light. See this section.
INTEGRATED CIRCUIT UNIT (ICU)
Service repair no - 86.55.93
NOTE: The control unit directly affects the following functions:
Front and rear wipers Courtesy lamp delay Lights on alarm Heated rear screen Horn Dim-dip Rear fog guard lamps Engine immobilisation Catalyst overheat Electric windows Sunroof
Remove
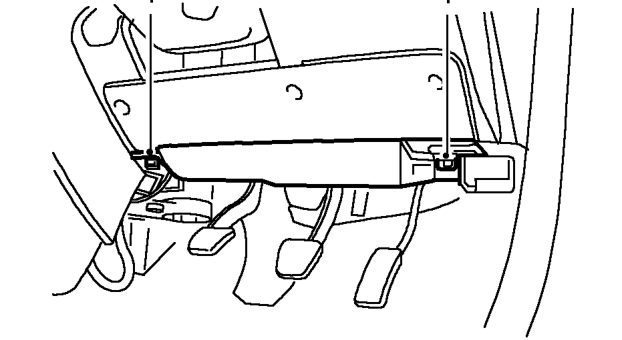
- Release 2 turnbuckles and remove closing panel.
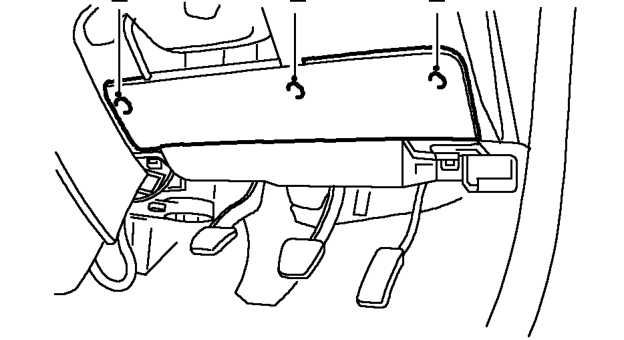
- Release 3 turnbuckles and remove passenger compartment fuse box cover.
Parts & tools for this job For 1995 Rover 200
- TOOLDigital multimeterSearch: automotive digital multimeter
- PARTAssorted fuse kitSearch: car fuse assortment kit
- TOOLWire crimper and connector kitSearch: wire crimper connector kit
Links open Amazon search results in a new tab. As an Amazon Associate I earn from qualifying purchases.