
Models with air conditioning (page 2 of 2)
- Make
- Rover
- Model
- 600 Repair Manual Supplement
- Year
- 1993–1999
- Section
- Repairs
Engine - L SeriesModels with air conditioning · page 2 of 2
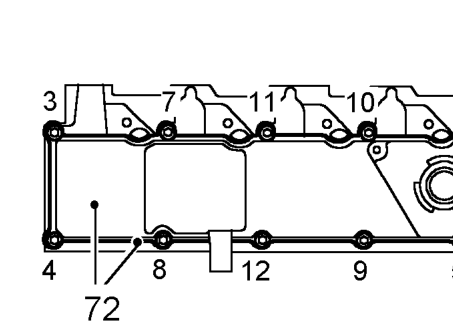
- Working in sequence shown, remove 12 bolts securing camshaft cover.
- Remove camshaft cover.
- Remove and discard gasket.
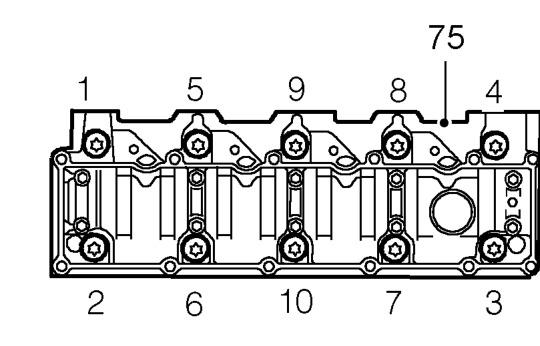
- Working in the sequence shown, progressively loosen and remove 10 cylinder head bolts.
CAUTION: Store cylinder head bolts in their original positions for refitment. Do not remove washers from bolts.
- Remove cylinder head assembly and place on wooden blocks or stands.
CAUTION: Place each end of cylinder head on blocks of wood to prevent damaging valves and glow plugs which protrude below face of cylinder head. If crankshaft is to be rotated, ensure timing pin 18G 1523 is removed prior to rotating crankshaft and is refitted on completion. Do not remove locking pin 18G 1717.
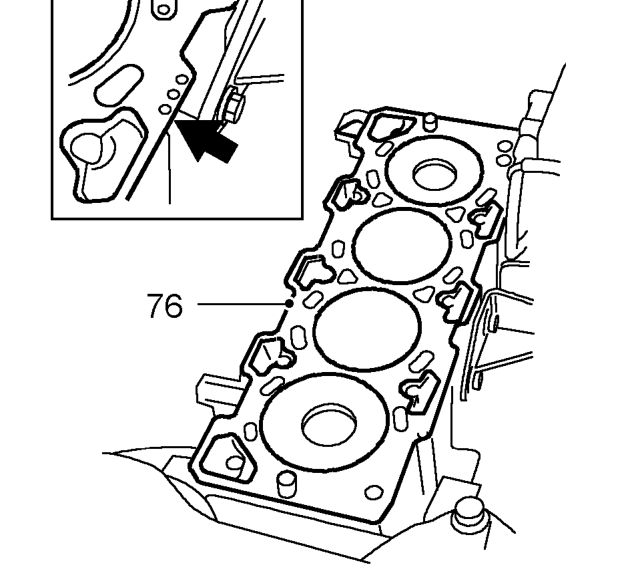
- Remove cylinder head gasket.
CAUTION: Note the gasket thickness indicator and ensure the same thickness gasket is used on refitment of cylinder head.
Parts & tools for this job For 1993 Rover 600
- TOOLA/C manifold gauge setSearch: AC manifold gauge set
- TOOLUV leak detection kitSearch: AC UV leak detection kit
- PARTCabin filterSearch: Rover 600 1993 cabin filter
Links open Amazon search results in a new tab. As an Amazon Associate I earn from qualifying purchases.