
Models with air conditioning (page 3 of 4)
- Make
- Rover
- Model
- 600 Repair Manual Supplement
- Year
- 1993–1999
- Section
- Repairs
Engine - L SeriesModels with air conditioning · page 3 of 4
- Apply Loctite 638 to mating face of engine RH mounting plate, fit plate to engine mounting studs.
- Fit engine RH mounting plate and secure with 4 nuts and 2 bolts. Tighten nuts to 35 Nm and bolts to 45 Nm.
- Clean engine RH mounting bracket dowels and dowel holes.
- Fit engine RH mounting and bracket assembly.
- Tighten bolts securing bracket to engine to 105 Nm.
- Fit restraint bar to mounting studs and tighten nuts to 45 Nm.
- Tighten nut securing bracket to mounting to 80 Nm.
- Remove support jack and block of wood.
- Fit RH upper steady bar and tighten through bolts to 80 Nm.Tighten through bolt to body last.
- Clean crankshaft front pulley and timing belt gear.
- Fit camshaft timing belt lower front cover. See this section.
- Check that camshaft gear timing mark is aligned with mark on back cover.
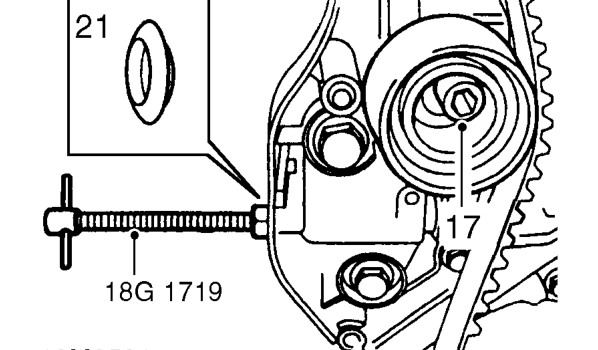
- Loosen tensioner pulley Allen bolt until tensioner moves easily without tipping.
- Release camshaft timing belt tensioner plunger using tool 18G 1719.
- Remove tool 18G 1719 from camshaft timing belt tensioner, tighten Allen bolt to 55 Nm.
CAUTION: Do not exceed specified torque.
- Remove timing pin 18G 1523 from flywheel.
- Fit camshaft timing belt tensioner access plug in rear cover.
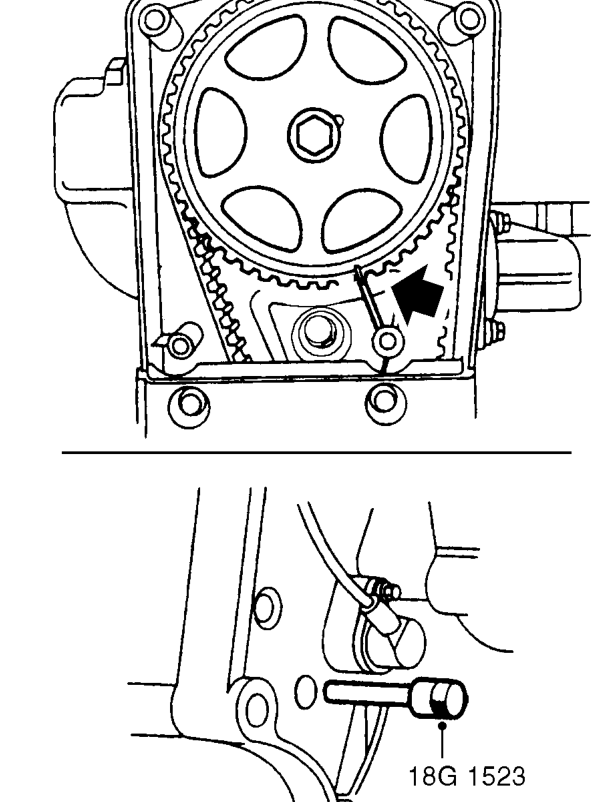
- Using crankshaft pulley bolt, rotate crankshaft 2 turns clockwise and align camshaft gear timing marks.
CAUTION: Do not use camshaft gear, gear retaining bolt or timing belt to rotate crankshaft.
- Fit timing pin 18G 1523 into hole in flywheel ensuring that pin is fully inserted in hole.
- Loosen tensioner pulley Allen bolt until tensioner pulley moves to tension belt then tighten Allen bolt to 55 Nm.Fit access plug in timing belt lower cover.
- Remove fuel injection pump timing belt cover. See this section.
- Ensure timing pin 18G 1523 is still inserted in hole in flywheel and camshaft gear timing mark is aligned with mark on back cover.
Parts & tools for this job For 1993 Rover 600
- TOOLA/C manifold gauge setSearch: AC manifold gauge set
- TOOLUV leak detection kitSearch: AC UV leak detection kit
- PARTCabin filterSearch: Rover 600 1993 cabin filter
Links open Amazon search results in a new tab. As an Amazon Associate I earn from qualifying purchases.