
Aerial (page 2 of 2)
- Make
- Rover
- Model
- 200 Workshop Manual
- Year
- 1995–1999
- Section
- Repairs
ElectricalAerial · page 2 of 2
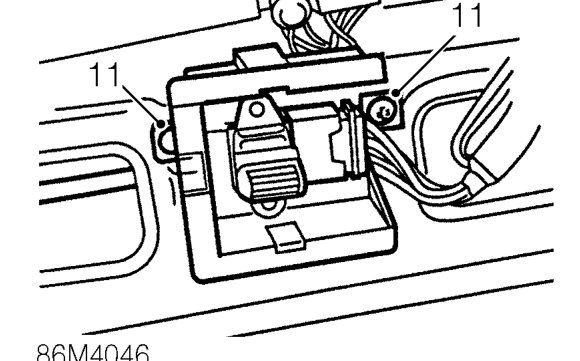
- Models with sun roof: Remove 2 screws securing sun roof switch mounting to roof and remove mounting.
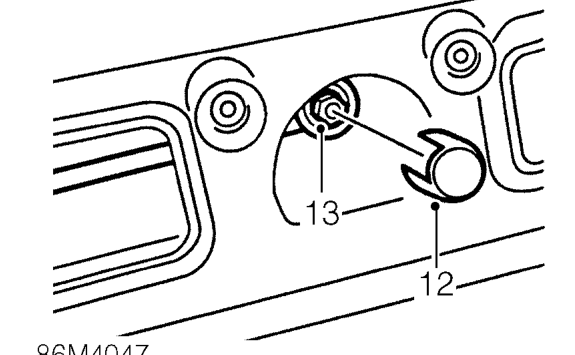
- Remove cover from end of coaxial cable.
- Remove nut securing coaxial cable to aerial base.
- Remove aerial base.
Refit
- Fit aerial base to roof.
- Fit and tighten nut securing aerial base to roof.
- Connect coaxial cable to aerial base and fit cover.
- Models with sun roof: Position sun roof switch mounting and secure with screws.
- Position front of headlining to roof and secure with trim studs.
- Models with sun roof: Position sun roof switch finisher and secure to headlining.
- Fit sun visor clips to headlining and secure with screws.
- Fit sun visors to headlining and secure with screws.
- Fit ’A’ post upper trim casings. See BODY, Interior trim components.
- Fit seals to front door apertures.
- Fit aerial to aerial base.
Parts & tools for this job For 1995 Rover 200
- TOOLDigital multimeterSearch: automotive digital multimeter
- PARTAssorted fuse kitSearch: car fuse assortment kit
- TOOLWire crimper and connector kitSearch: wire crimper connector kit
Links open Amazon search results in a new tab. As an Amazon Associate I earn from qualifying purchases.