
Battery (page 2 of 2)
- Make
- Rover
- Model
- 200 Workshop Manual
- Year
- 1995–1999
- Section
- Repairs
ElectricalBattery · page 2 of 2
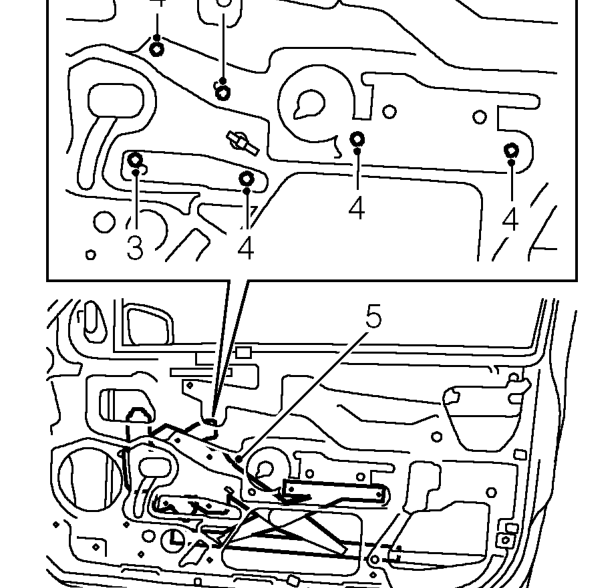
- Loosen 2 bolts securing regulator to door.
- Remove 4 bolts securing regulator to door.
- Release and remove regulator assembly from door.
NOTE: Before removing power window motor mark the location by scribing a line across the sector gear and regulator.
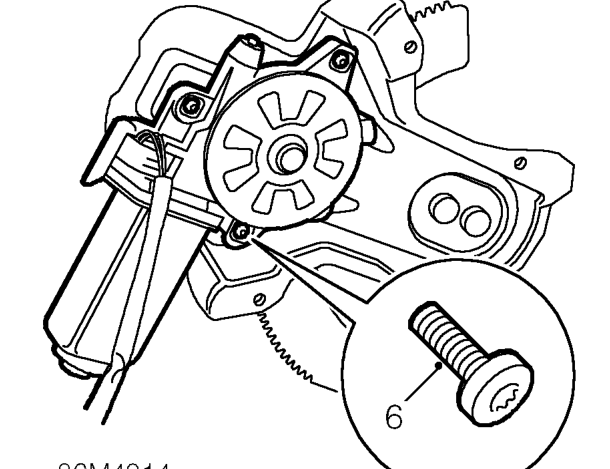
- Using a Torx bit remove 3 screws securing motor to regulator, then remove the motor.
Refit
- Apply grease to motor gear and regulator pivot points.
- Ensure regulator marks are aligned, position motor to regulator and tighten screws to 7 Nm.
- Position and align regulator assembly to door.
- Fit bolts to secure regulator, tighten to 8 Nm.
- Align roller guide, fit bolts to align with original marks and tighten to 8 Nm.
- Connect motor multiplug, secure clip to door.
- Refit front door glass. See BODY, Interior trim components.
Parts & tools for this job For 1995 Rover 200
- TOOLBattery testerSearch: car battery tester
- TOOLDigital multimeterSearch: automotive digital multimeter
- TOOLBattery terminal cleanerSearch: battery terminal cleaner
Links open Amazon search results in a new tab. As an Amazon Associate I earn from qualifying purchases.