
Starter switch (page 2 of 2)
- Make
- Rover
- Model
- 200 Workshop Manual
- Year
- 1995–1999
- Section
- Repairs
ElectricalStarter switch · page 2 of 2
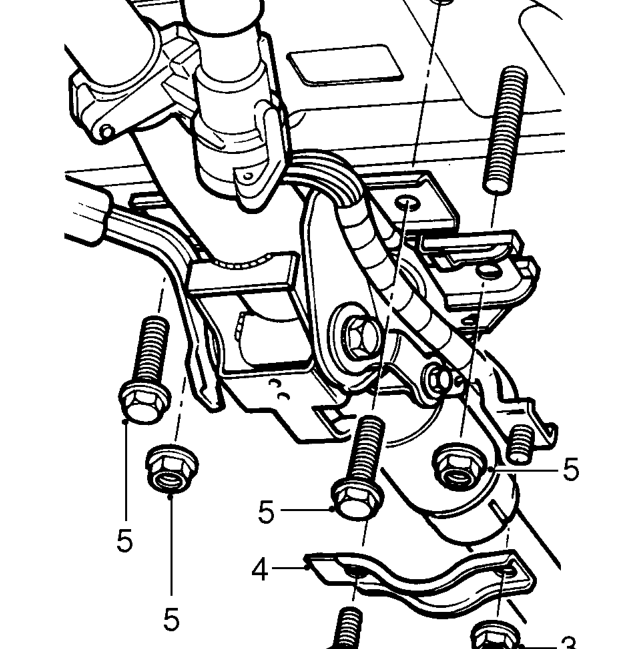
- Remove nut and bolt securing lower column clamp to pivot bracket.
- Remove clamp.
- Remove 2 flange nuts and 2 bolts securing column upper bracket to body.
- Lower the steering column assembly.
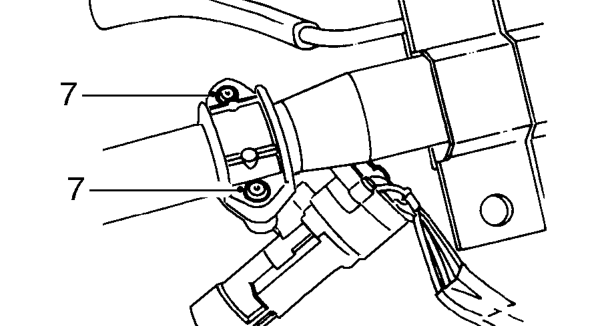
- Centre punch and drill out 2 shear bolts using a 5 mm drill.
CAUTION: Take care not to damage switch body if switch is to be refitted.
- Remove starter switch and bracket.
Refit
- Position starter switch to column and fit shear bolts loosely.
- Insert starter key, check operation of steering lock and key turns freely.
- Tighten shear bolts fully and shear heads off.
- Raise column and engage top bracket on studs and fit nuts, DO NOT tighten.
- Fit lower clamp, tighten nut and bolt to 22 Nm.
- Tighten top bracket nuts and bolts to 16 Nm.
- Connect ignition switch multiplugs to fuse box and harness.
- 98MY on: Fit passive coil. See this section.
- Fit steering column nacelle. See STEERING, Repairs.
Parts & tools for this job For 1995 Rover 200
- TOOLOBD2 scannerSearch: OBD2 scanner
- TOOLDigital multimeterSearch: automotive digital multimeter
- TOOLBack-probe test leadsSearch: back probe test leads
Links open Amazon search results in a new tab. As an Amazon Associate I earn from qualifying purchases.