
Oil pressure switch
- Make
- Rover
- Model
- 800 Workshop Manual
- Year
- 1996–1999
- Section
- Repairs › Oil pressure switch
Engine - KV6Oil pressure switch
Refit
- Clean sealing surfaces on sump and crankcase extension, use foam action gasket remover and a plastic scraper - DO NOT USE A METAL SCRAPER ON SEALING SURFACES
- Apply a 2 mm bead of Hylogrip 2000 sealant along centre of sump flange and use a roller to spread sealant across flange.
- Fit NEW gasket to dipstick flange.
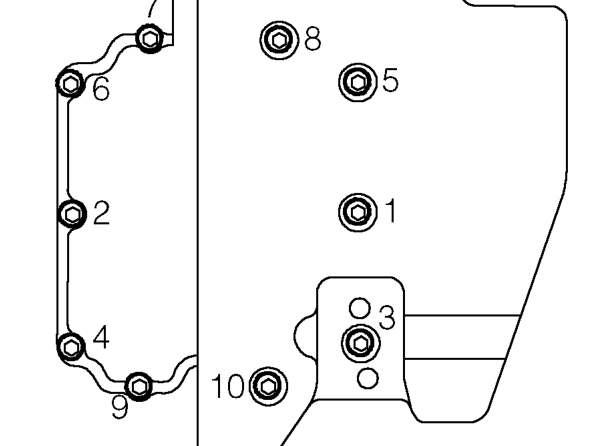
- Position sump and engage dipstick flange, fit bolts and tighten progressively in sequence shown to 25 Nm.
- Fit nuts to dipstick flange and tighten to 9 Nm.
- Fit support bracket to exhaust front pipe and tighten bolts and nuts to 25 Nm.
- Fit splash shield to inner wing, fit spacer to forward screw, fit and tighten screws to 9 Nm.
- Fit centre beam, tighten bolts to 60 Nm.
- Remove stand(s) and lower vehicle.
- Connect battery earth lead.
- Insert dipstick.
- Fill engine with correct grade and quantity of oil. See Adjustments.
OIL PRESSURE SWITCH
Service repair no - 12.60.50
Remove
- Disconnect battery earth lead.
- Raise front of vehicle.
WARNING: Support on safety stands.
- Turn wheel onto RH lock
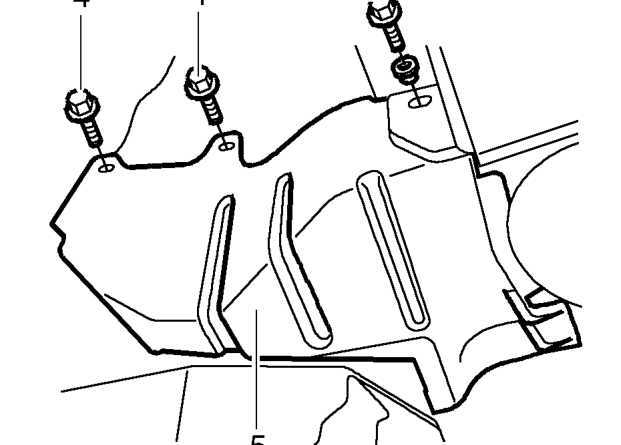
- Remove screws securing RH splash shield to inner wing and collect spacer from forward screw.
- Remove splash shield.
- Position container below engine oil filter to collect oil spillage.
Parts & tools for this job For 1996 Rover 800
- TOOLOBD2 scannerSearch: OBD2 scanner
- TOOLDigital multimeterSearch: automotive digital multimeter
- TOOLBack-probe test leadsSearch: back probe test leads
Links open Amazon search results in a new tab. As an Amazon Associate I earn from qualifying purchases.