
Models with ABS:
- Make
- Land Rover
- Model
- Freelander Workshop Manual
- Year
- 1998–2000
- Section
- Repairs › Models with ABS:
ElectricalModels with ABS:
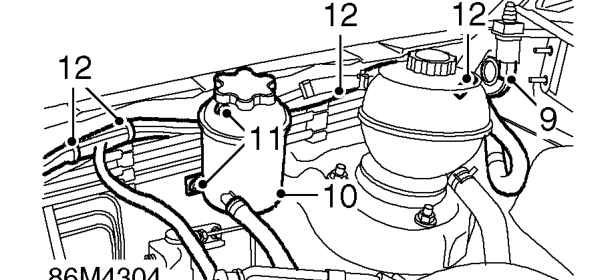
- Disconnect multiplug from bonnet switch.
- Release PAS reservoir and position aside.
- Remove 2 bolts from reservoir support bracket and remove bracket.
- Release 4 harness retaining clips.
- Release front screen washer tube from harness and position aside.
- With assistance feed harness through bulkhead into vehicle interior.
- Remove battery carrier. See this section.
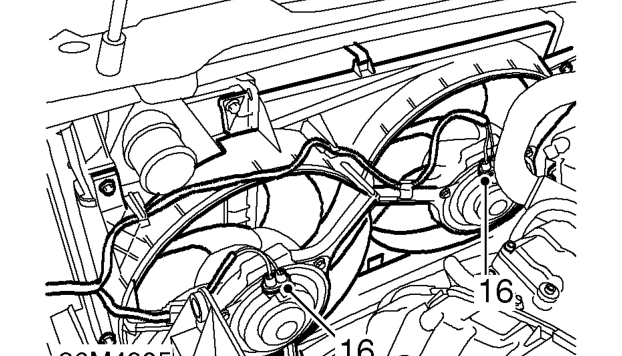
- Disconnect 2 multiplugs from cooling fans and release harness from clips.
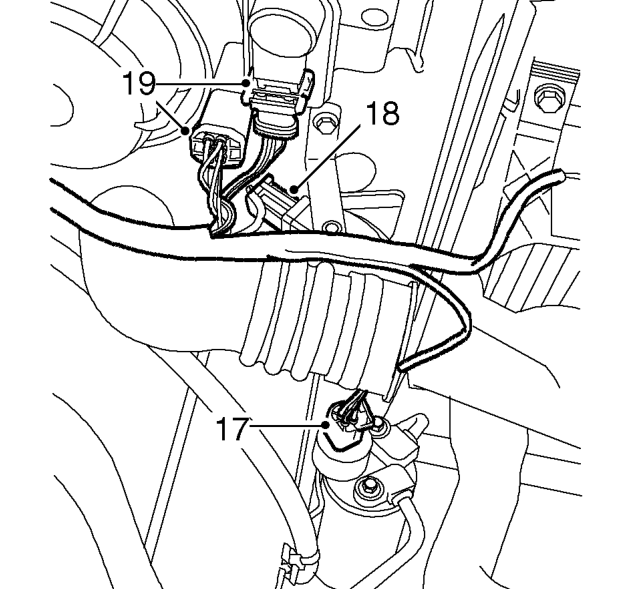
- Disconnect multiplug from receiver/ drier.
- Disconnect multiplug from horn.
- Disconnect 2 multiplugs from LH headlamp and headlamp levelling motor.
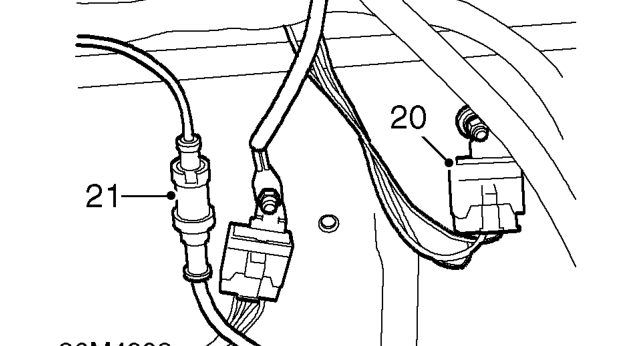
- Remove nut securing LH earth header and release header.
Models with ABS:
- Disconnect multiplug from front LH ABS speed sensor and release harness from clips.
Parts & tools for this job For 1998 Land Rover Freelander
- TOOLOBD2 scanner with ABSSearch: OBD2 scanner ABS SRS
- TOOLDigital multimeterSearch: automotive digital multimeter
Links open Amazon search results in a new tab. As an Amazon Associate I earn from qualifying purchases.