
Sensor - volumetric - alarm system - 5 door
- Make
- Land Rover
- Model
- Freelander Workshop Manual
- Year
- 1998–2000
- Section
- Repairs › Sensor - volumetric - alarm system - 5 door
ElectricalSensor - volumetric - alarm system - 5 door
SENSOR - VOLUMETRIC - ALARM SYSTEM - 5 DOOR
Service repair no - 86.77.29
Remove
- Remove LH rear quarter upper trim casing. See BODY, Interior trim components.
- Remove LH ’A’ post finisher. See BODY, Interior trim components.
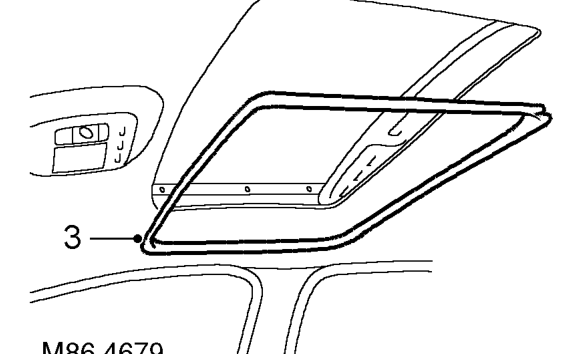
- Release and remove sunroof finisher.
- Remove LH front and rear grab handles. See BODY, Interior trim components.
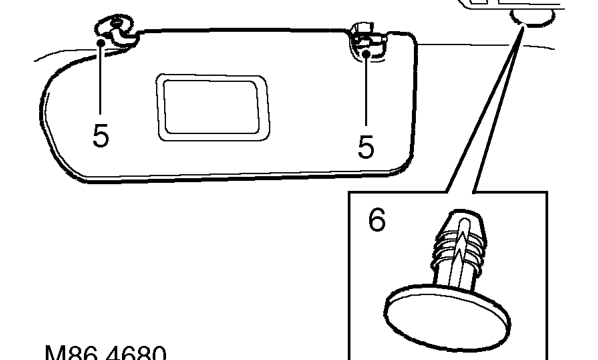
- Remove 3 screws and remove LH sun visor.
- Remove trim stud from centre of headlining.
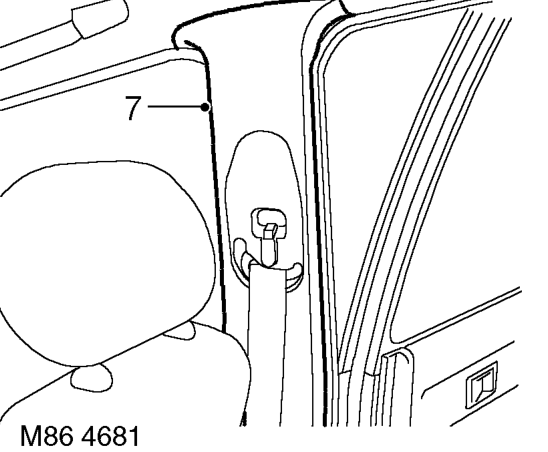
- Release LH ’B’ post upper finisher.
- Carefully lower headlining to gain access to volumetric sensor.
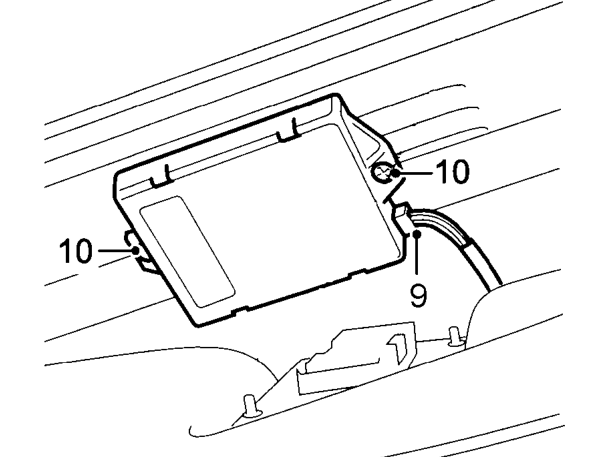
- Disconnect multiplug from volumetric sensor.
- Remove 2 screws and remove sensor.
Refit
- Position sensor to roof bracket and tighten screws.
- Connect multiplug.
- Position and secure ’B’ post finisher.
- Position sun visor and tighten screws.
- Fit front and rear grab handles. See BODY, Interior trim components.
- Fit ’A’ post finisher. See BODY, Interior trim components.
- Position and secure sunroof finisher.
- Fit LH rear quarter upper trim casing. See BODY, Interior trim components.
- Secure front and rear door seals.
Parts & tools for this job For 1998 Land Rover Freelander
- TOOLOBD2 scannerSearch: OBD2 scanner
- TOOLDigital multimeterSearch: automotive digital multimeter
- TOOLBack-probe test leadsSearch: back probe test leads
Links open Amazon search results in a new tab. As an Amazon Associate I earn from qualifying purchases.