
Models with ABS:
- Make
- Land Rover
- Model
- Freelander Workshop Manual
- Year
- 1998–2000
- Section
- Repairs › Models with ABS:
ElectricalModels with ABS:
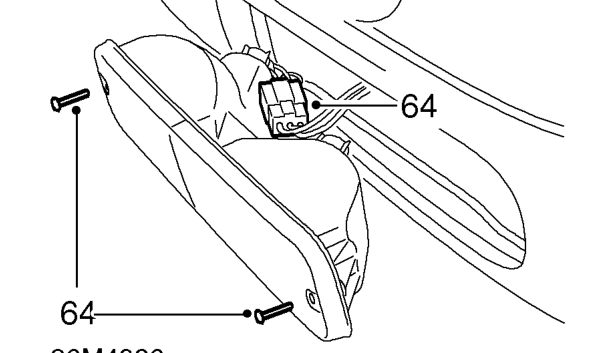
- Remove 4 screws from rear lamps, release lamps and disconnect multiplugs.
- Release harness clips and pull harness into luggage compartment.
- Release main harness retaining clips and pull harness into vehicle interior.
- Remove main harness from vehicle.
Refit
- Lay main harness in vehicle.
- Locate rear section and secure in retaining clips.
- Feed harness to rear lamps, secure in clips and grommets.
- Connect multiplugs to rear lamps, fit rear lamps and secure with screws.
- Fit LH rear earth header and secure nut.
- Connect multiplugs to reverse and hazard lamps.
- Fit RH rear earth header and secure nut.
- Connect multiplug to towing electrics.
- Connect rear screen washer tube.
- Connect tail door multiplugs.
- Connect and secure rear window lift and wash/wipe relays.
Models with ABS:
- Connect both rear ABS speed sensor multiplugs and secure harness in grommets and clips.
All models:
- Connect multiplug to tank unit and secure grommet.
- Fit tank access cover and tighten screws.
- Fit luggage compartment carpet. See BODY, Interior trim components.
- Connect and secure multiplugs at base of ’B/C’ post.
- Position harness to sills and fascia and secure harness clips.
- Fit face level vent ducting.
- Raise steering column, fit and tighten nuts to 14 Nm.
- Fit rear heater ducting and tighten nut.
- Secure SRS section of harness in clips.
- Connect Lucar to handbrake switch.
Models with ABS:
- Connect multiplug to gear lever hill descent switch.
All models:
- Connect floor tunnel earth header and tighten nut.
- Connect earth lead to airbag ECU securing bolt. Fit bolt and tighten to 9 Nm.
- Connect and secure multiplug to airbag ECU.
- Connect multiplug to throttle position sensor.
- Connect Lucars to brake lamp switch.
- Secure harness clips to steering column.
- Connect multiplug to steering column switch.
- Connect roof harness multiplug and aerial socket and secure in position.
- Connect and secure multiplugs to brake light and ABS modulator relays.
- Connect fuse box multiplugs, position fuse box fit and tighten screws.
- Connect and secure multiplugs at both ’A’ posts.
- Connect multiplugs to side repeater lamps, locate and secure lamps.
Parts & tools for this job For 1998 Land Rover Freelander
- TOOLOBD2 scanner with ABSSearch: OBD2 scanner ABS SRS
- TOOLDigital multimeterSearch: automotive digital multimeter
Links open Amazon search results in a new tab. As an Amazon Associate I earn from qualifying purchases.