
Alternator Belt Adjustment (With A/C)
- Make
- Rover
- Model
- 600 Rover 600 Repair Manual - Volumes 1 and 2 - 2nd Edition
- Section
- Repairs › Alternator Belt Adjustment (With A/C)
ElectricalAlternator Belt Adjustment (With A/C)
Alternator Belt Adjustment (With A/C)
Deflection Method
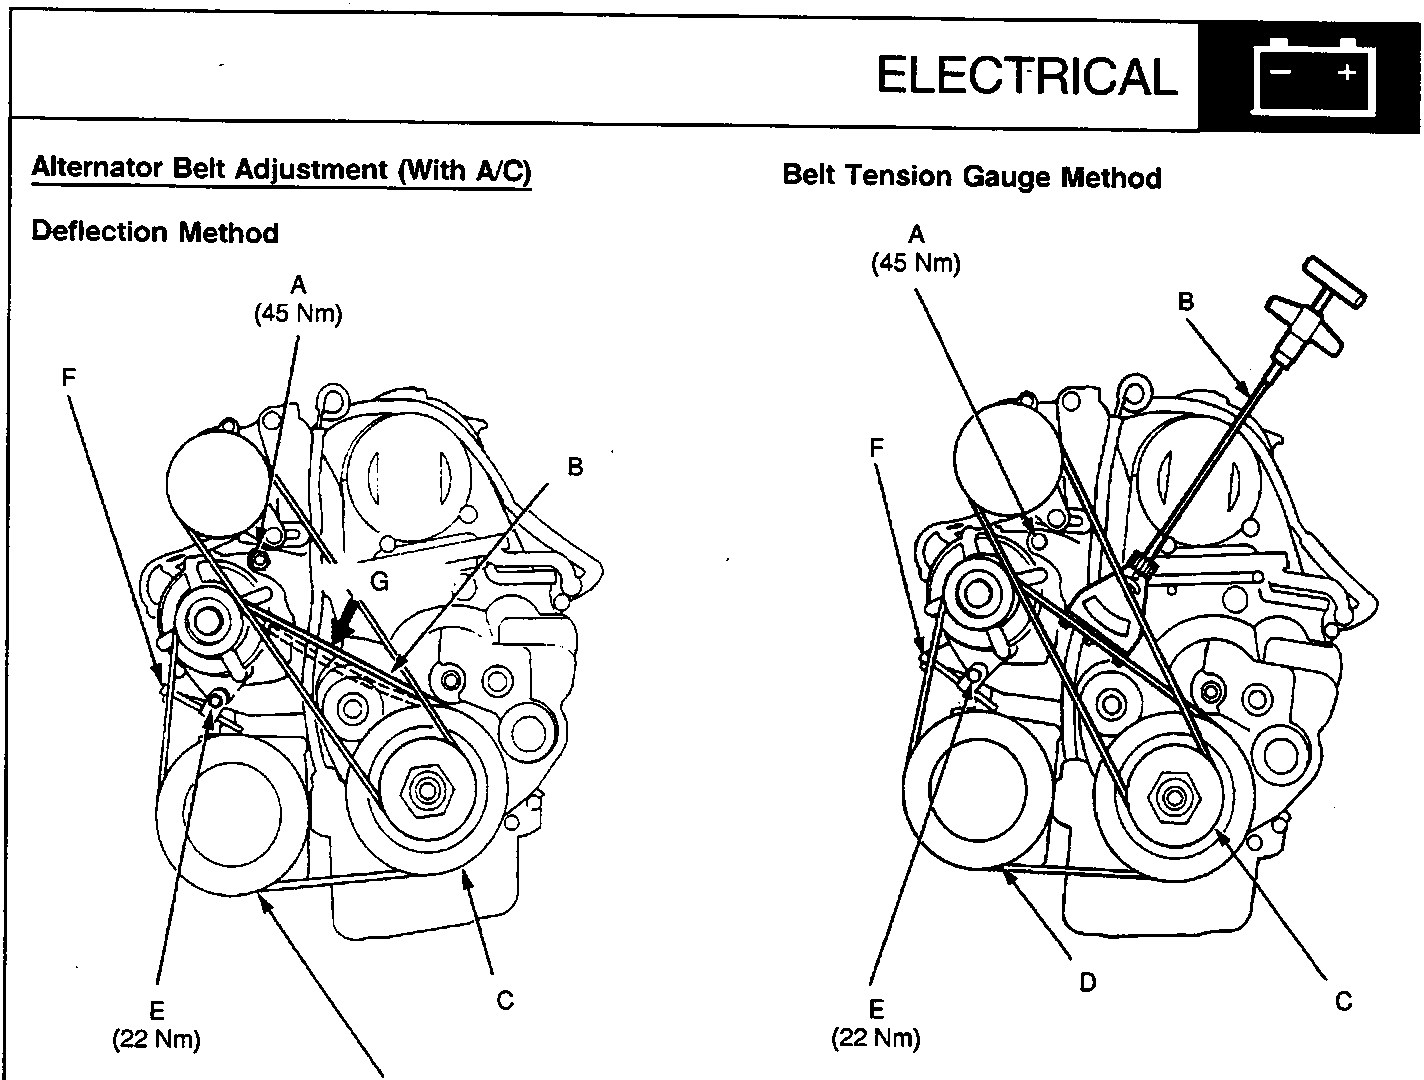
86M 2075
- A Through bolt
- B Alternator belt
- C Crankshaft pulley
- D A/C compressor
- E Adjustment locknut
- F Adjusting bolt
- Apply a force of 100N and measure the deflection between the alternator and the crankshaft pulley.
Deflection: 10 ÷ 12 mm
- On a brand – new belt (one that has been run for less than five minutes), the deflection should be 4.5 ÷ 7 mm when first measured.
- If there are cracks or any damage evident on the belt, replace it with a new one.
- Loosen the through bolt and adjustment locknut.
- Turn the adjusting bolt to obtain the proper belt tension, then retighten the nut and through bolt.
- Recheck the belt deflection.
Belt Tension Gauge Method
86M 2076
- A Through bolt
- B Belt tension gauge
- C Crankshaft pulley
- D A/C compressor
- E Adjustment locknut
- F Adjusting bolt
- Attach the belt tension gauge to the belt and measure the tension of the belt.
Tension: 450 ÷ 600N
- On a brand – new belt (one that has been run for less than five minutes), the tension should be 950 ÷ 1150N when first measured.
- Follow the manufacturer's instructions for the belt tension gauge.
- If there are cracks or any damage evident on the belt, replace it with a new one.
- Loosen the through bolt and adjustment locknut.
- Turn the adjusting bolt to obtain the proper belt tension, then retighten the nut and through bolt.
- Recheck the tension of the belt.
Parts & tools for this job For Rover 600
- TOOLBattery testerSearch: car battery tester
- TOOLDigital multimeterSearch: automotive digital multimeter
- TOOLBattery terminal cleanerSearch: battery terminal cleaner
Links open Amazon search results in a new tab. As an Amazon Associate I earn from qualifying purchases.