
Overrunning Clutch Check
- Make
- Rover
- Model
- 600 Rover 600 Repair Manual - Volumes 1 and 2 - 2nd Edition
- Section
- Repairs › Overrunning Clutch Check
ElectricalOverrunning Clutch Check · page 1 of 2
- Remove the starter solenoid.
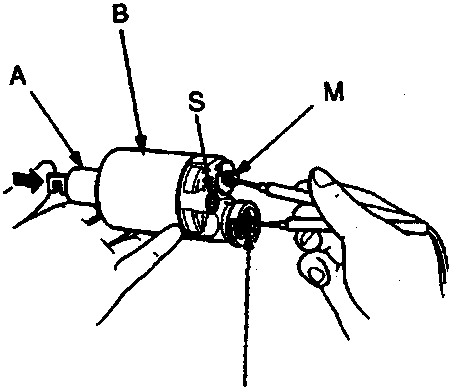
86M 2019
A Plunger
B Solenoid housing (earth)
| Terminal Position | B | M | S | EARTH |
|---|---|---|---|---|
| RELEASED | ● | ● | ● | |
| PUSHED | ● | ● | ● | ● |
- Check for continuity between the terminals in each solenoid plunger position according to the table.
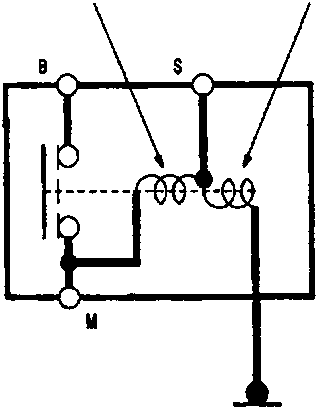
86M 2020
A Pull – in coil
B Hold – in coil
Overrunning Clutch Check
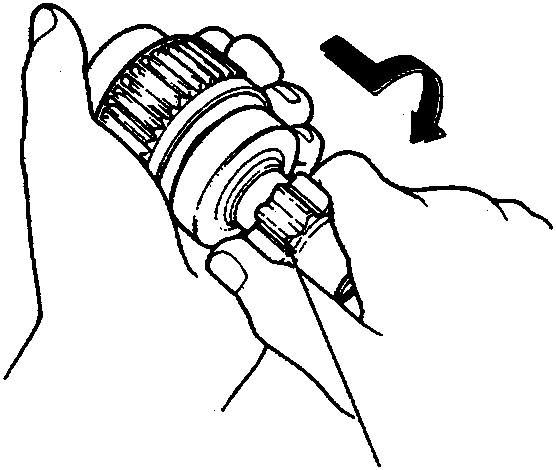
86M 2021
A Starter drive gear
- Check that the overrunning clutch moves along the shaft freely. If it does not, replace it.
- Check that the overrunning clutch locks in one direction and rotates smoothly in reverse. If it does not lock in either direction or it locks in both directions, replace it.
- Check the starter drive gear for wear and damage. If it has any, replace the overrunning clutch assembly; the gear is not available separately.
Note: Check the condition of the flywheel or torque converter ring gear if the starter drive gear teeth are damaged.
Original page
Parts & tools for this job For Rover 600
- PARTClutch kitSearch: Rover 600 clutch kit
- TOOLClutch alignment toolSearch: clutch alignment tool
- FLUIDGear oilSearch: Rover 600 manual gearbox oil
Links open Amazon search results in a new tab. As an Amazon Associate I earn from qualifying purchases.