
Vacuum Diaphragm Actuator and Mount Testing
- Make
- Rover
- Model
- 600 Rover 600 Repair Manual - Volumes 1 and 2 - 2nd Edition
- Section
- Repairs › Vacuum Diaphragm Actuator and Mount Testing
ElectricalVacuum Diaphragm Actuator and Mount Testing
Vacuum Diaphragm Actuator and Mount Testing

- A Vacuum pump gauge
- B Vacuum hose (to vacuum diaphragm actuator)
- C Solenoid valve
- Disconnect the vacuum hose from the engine mount control solenoid valve, then connect a vacuum pump/gauge.
Note: Clean and oil the vacuum diaphragm actuator rod, engine mount rotor, and lever linkage.
- Apply vacuum of above 230 mmHg and check if the engine mount rotor operates to full stroke (rotor lever angle is 80 degrees).
- If the engine mount rotor does not operate properly replace the engine mount.
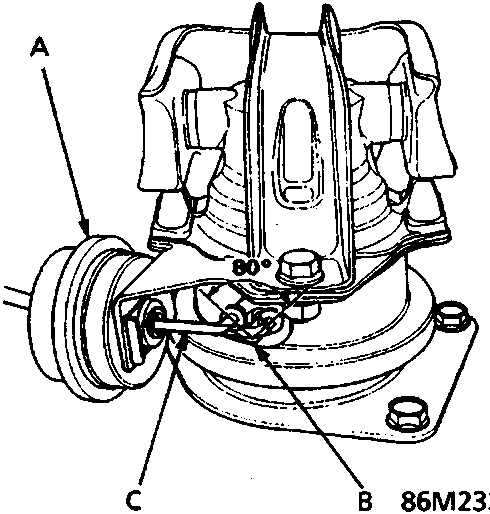
- A Vacuum diaphragm actuator
- B Rotor lever
- C Actuator rod
Parts & tools for this job For Rover 600
- TOOLDigital multimeterSearch: automotive digital multimeter
- PARTAssorted fuse kitSearch: car fuse assortment kit
- TOOLWire crimper and connector kitSearch: wire crimper connector kit
Links open Amazon search results in a new tab. As an Amazon Associate I earn from qualifying purchases.