
Combination Light Switch Test
- Make
- Rover
- Model
- 600 Rover 600 Repair Manual - Volumes 1 and 2 - 2nd Edition
- Section
- Repairs › Combination Light Switch Test
ElectricalCombination Light Switch Test · page 1 of 2
Combination Light Switch Test
CAUTION: All SRS electrical wiring harnesses are covered with yellow outer insulation. Replace the entire affected SRS harness assembly if it has an open circuit or damaged wiring. Before disconnecting the SRS wiring harness, turn the ignition switch off, disconnect the negative and positive battery cables, and wait at least three minutes. see SUPPLEMENTARY RESTRAINT SYSTEM
- Remove the dashboard lower cover .
- Disconnect the 12 – P connector from the main wire harness.
- Inspect the connector terminals to be sure they are all making good contact.
- If the terminals are bent, loose or corroded, repair them as necessary, and recheck the system.
- If the terminals look OK, check for continuity between them in each switch position according to the tables.
- – If there is no continuity between them, check for continuity in the switch harness.
- – If there is continuity in the harness, replace the combination light switch.
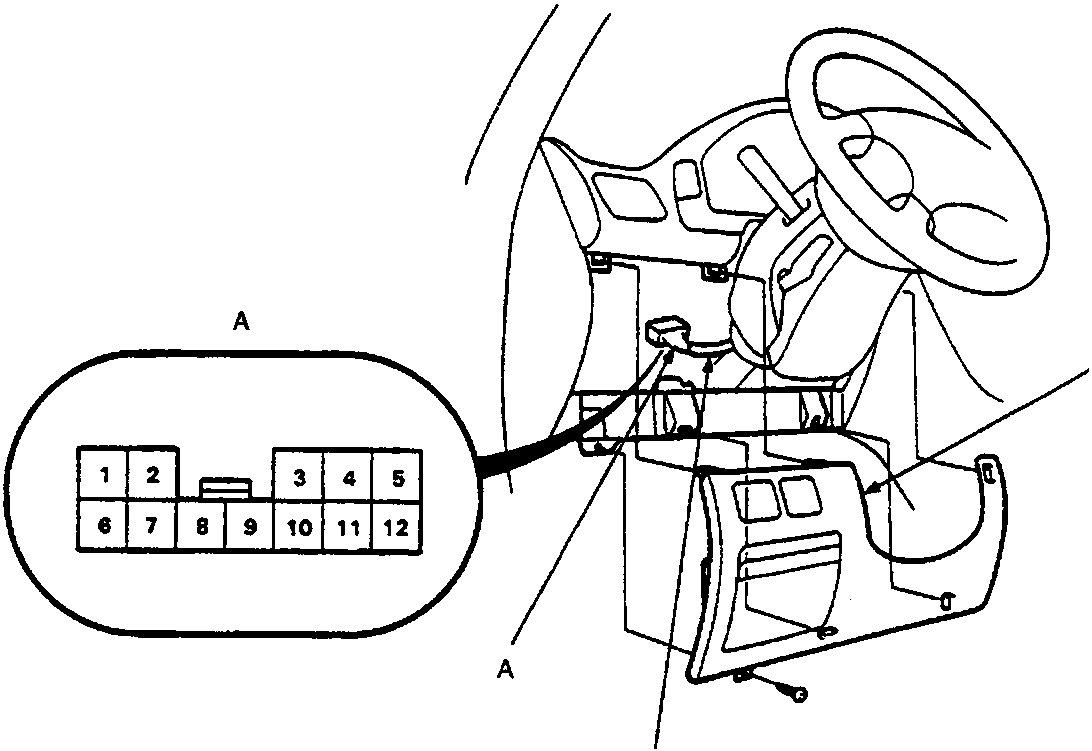
A 12 – P connector
B Switch harness
C Dashboard lower cover
Parts & tools for this job For Rover 600
- TOOLOBD2 scannerSearch: OBD2 scanner
- TOOLDigital multimeterSearch: automotive digital multimeter
- TOOLBack-probe test leadsSearch: back probe test leads
Links open Amazon search results in a new tab. As an Amazon Associate I earn from qualifying purchases.