
Number plate lights
- Make
- Rover
- Model
- 600 Rover 600 Repair Manual - Volumes 1 and 2 - 2nd Edition
- Section
- Repairs › Number plate lights
ElectricalNumber plate lights
NUMBER PLATE LIGHTS
Replacement
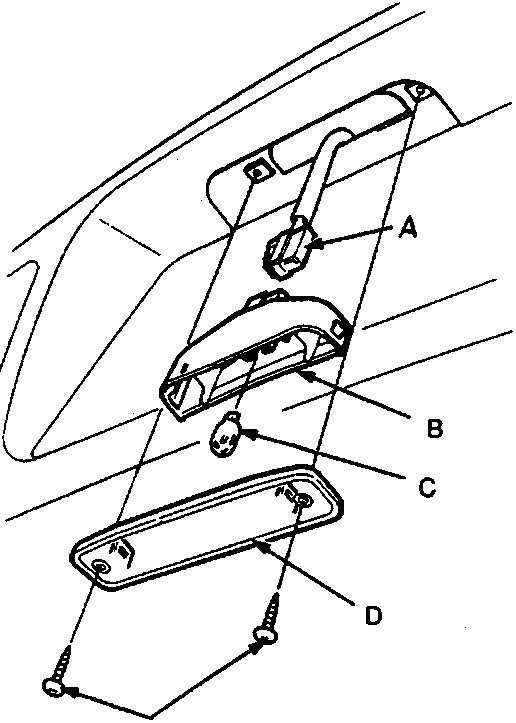
- A 2-P Connector
- B Housing
- C Bulb (5W)
- D Lens
- E Screws
- Remove the two screws from the number plate light and pull it out from the boot lid.
- Disconnect the 2-P connector from the number plate light and replace it.
- In case of a bulb replacement, remove the lens and replace the bulb.
TAIL LIGHTS
Replacement
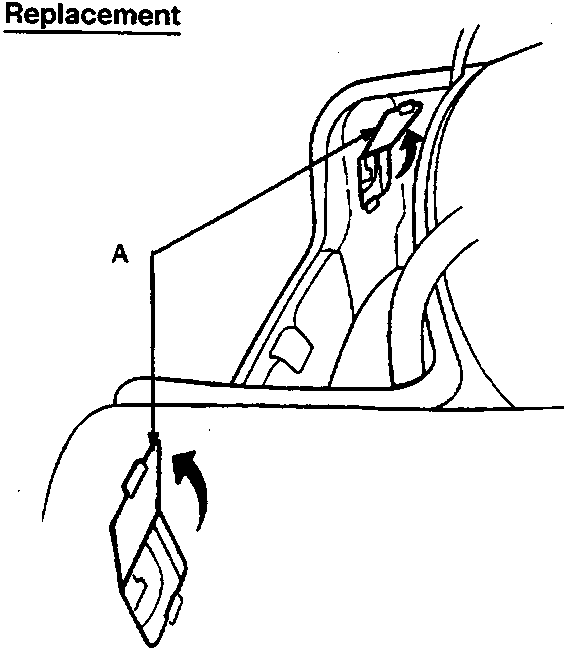
- A Access panels
- Open the boot lid and access panel.
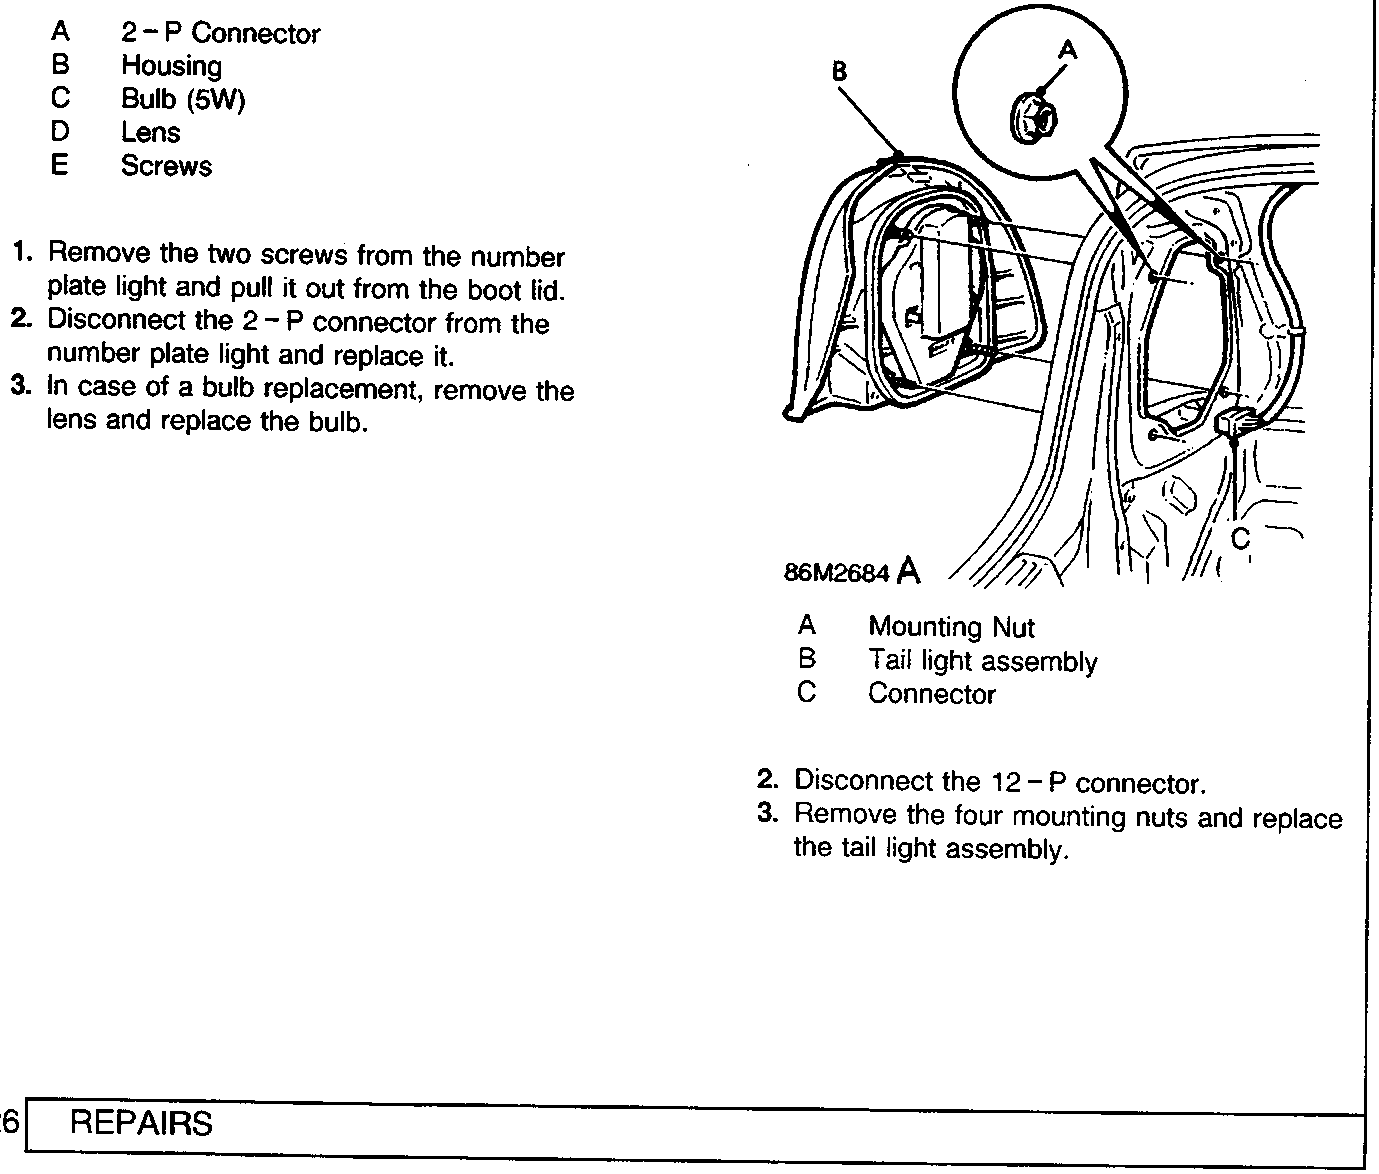
- A Mounting Nut
- B Tail light assembly
- C Connector
- Disconnect the 12-P connector.
- Remove the four mounting nuts and replace the tail light assembly.
Parts & tools for this job For Rover 600
- TOOLDigital multimeterSearch: automotive digital multimeter
- PARTAssorted fuse kitSearch: car fuse assortment kit
- TOOLWire crimper and connector kitSearch: wire crimper connector kit
Links open Amazon search results in a new tab. As an Amazon Associate I earn from qualifying purchases.