
Circuit Diagram
- Make
- Rover
- Model
- 600 Rover 600 Repair Manual - Volumes 1 and 2 - 2nd Edition
- Section
- Repairs › Circuit Diagram
ElectricalCircuit Diagram · page 1 of 3
Circuit Diagram
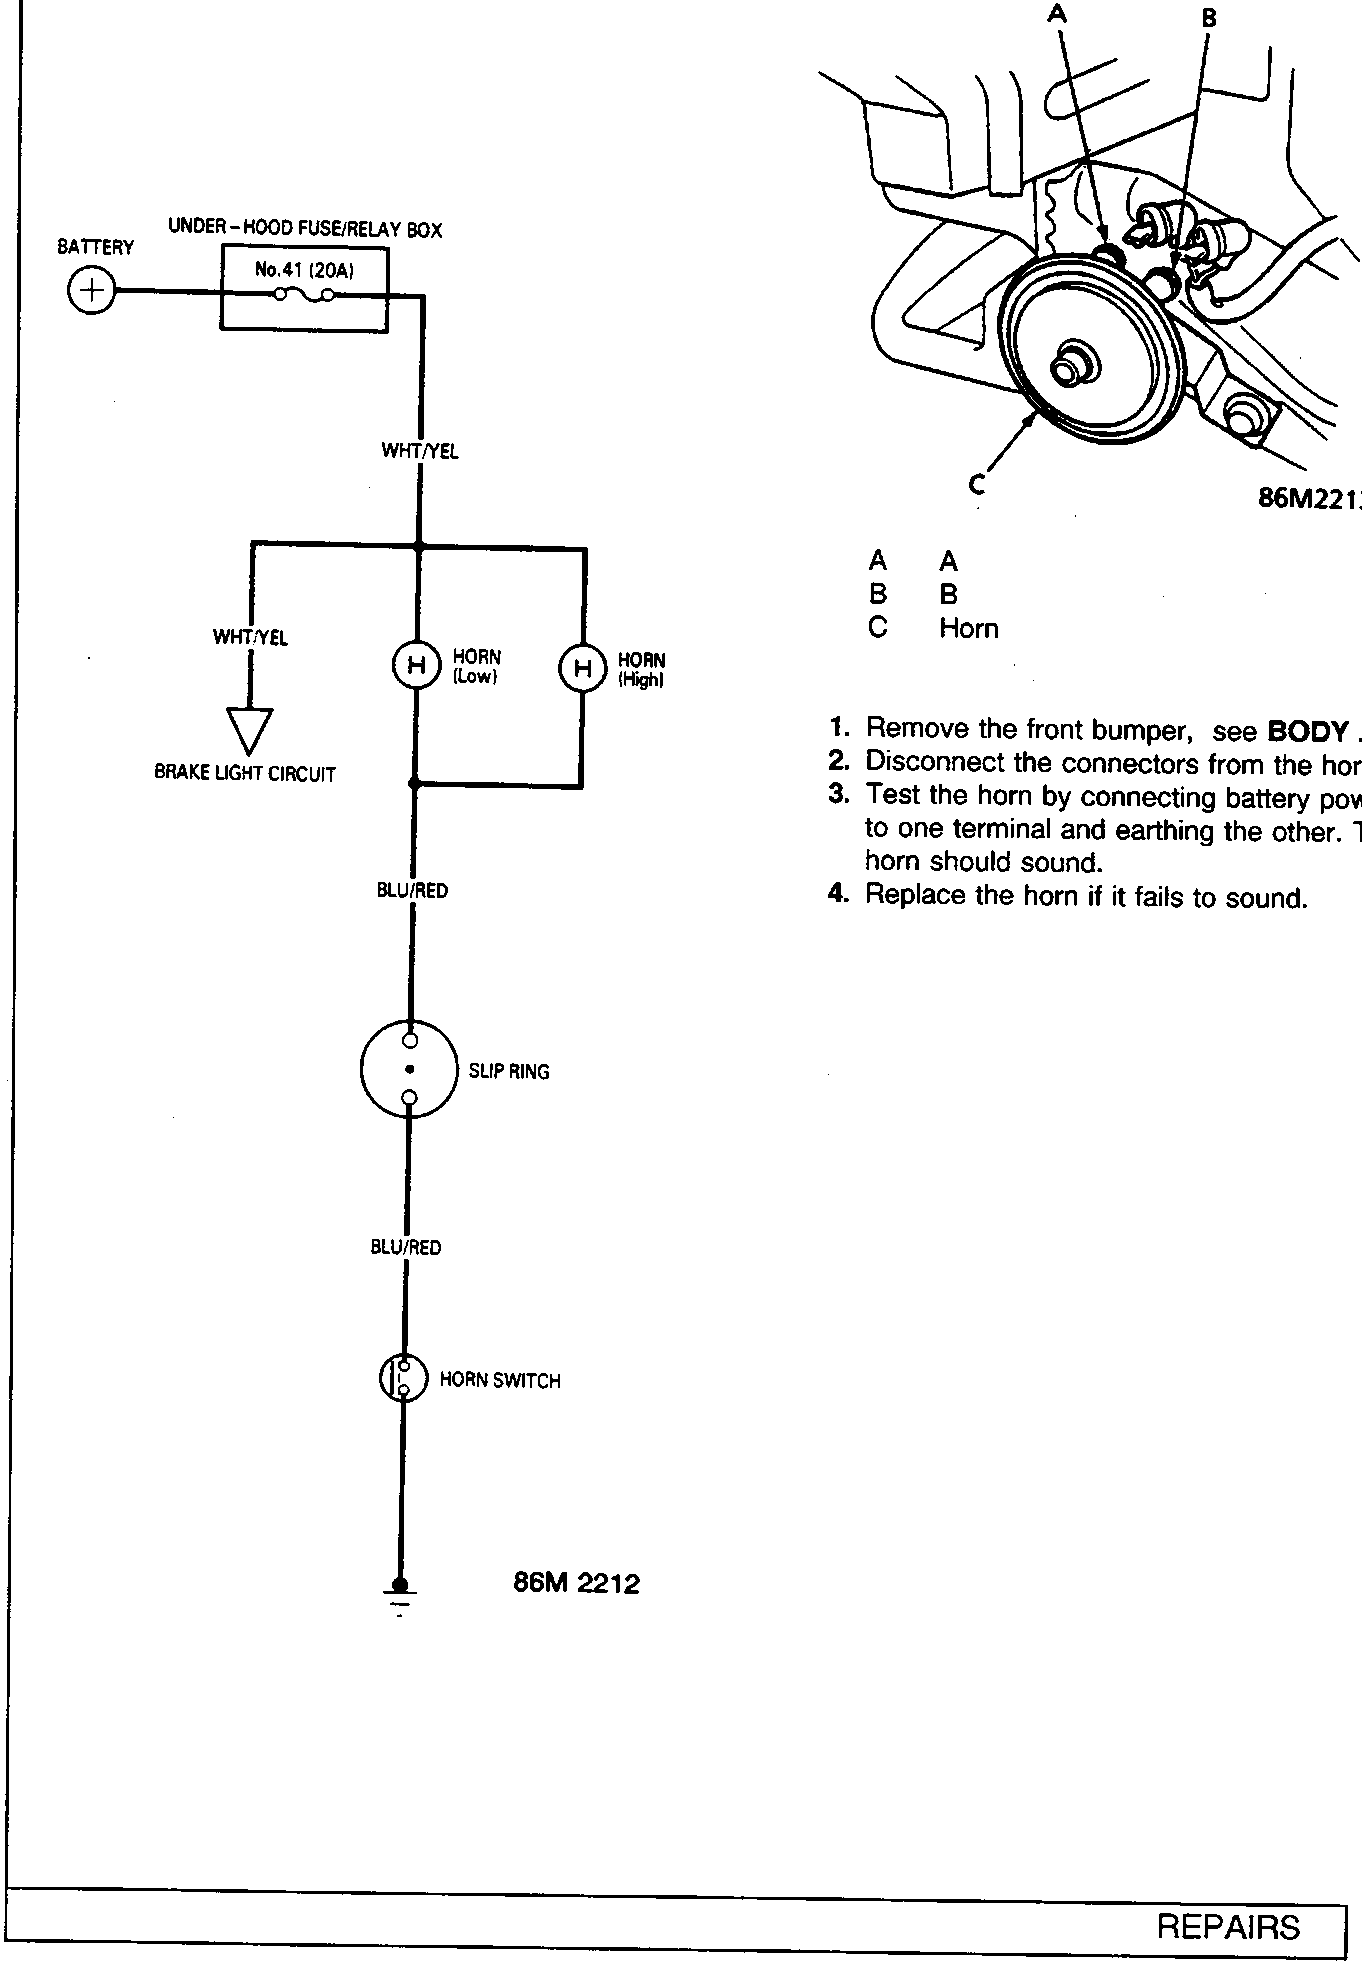
A A
B B
C Horn
- Remove the front bumper, see BODY.
- Disconnect the connectors from the horn.
- Test the horn by connecting battery power to one terminal and earthing the other. The horn should sound.
- Replace the horn if it fails to sound.
Parts & tools for this job For Rover 600
- TOOLDigital multimeterSearch: automotive digital multimeter
- PARTAssorted fuse kitSearch: car fuse assortment kit
- TOOLWire crimper and connector kitSearch: wire crimper connector kit
Links open Amazon search results in a new tab. As an Amazon Associate I earn from qualifying purchases.