
Vacuum Tank
- Make
- Rover
- Model
- 600 Rover 600 Repair Manual - Volumes 1 and 2 - 2nd Edition
- Section
- Repairs › Vacuum Tank
ElectricalVacuum Tank
Vacuum Tank
- Raise front of vehicle.
WARNING: Support on safety stands.
- Remove 5 outermost screws securing LH splash shield.
- Remove 7 scrivet fixings from the front of the LH wheelarch liner.
- Release front of wheelarch liner from wing panel.
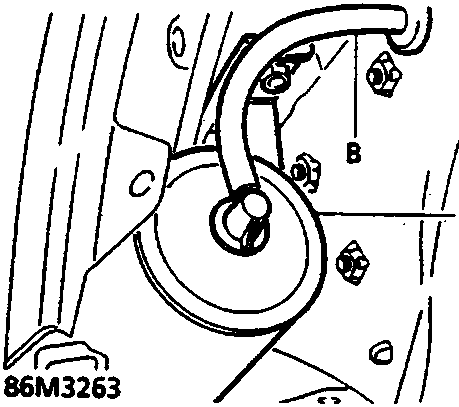
- Vacuum tank
- Vacuum hose
- Remove screw securing vacuum tank to panel.
- Disconnect vacuum hose and remove vacuum tank.
- Installation is the reversal of the removal procedure.
HIGH MOUNTED STOP LAMP
Remove
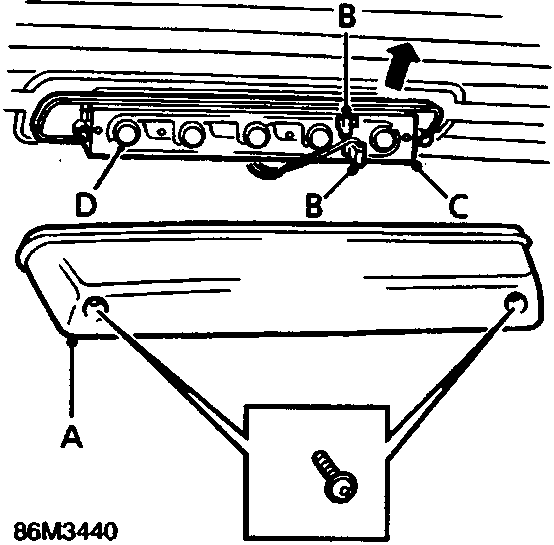
- Lamp cover
- Lucar connectors
- High mounted stop.
- Remove 2 TX20 screws and withdraw the cover.
- Remove cover.
Bulbs
- Remove bulb holder and pull capless bulb from holder to replace.
- Disconnect 2 Lucar connectors.
- Slide upward and remove lamp assembly from rear screen.
Refit
- Refit is reversal of removal procedure.
Parts & tools for this job For Rover 600
- TOOLDigital multimeterSearch: automotive digital multimeter
- PARTAssorted fuse kitSearch: car fuse assortment kit
- TOOLWire crimper and connector kitSearch: wire crimper connector kit
Links open Amazon search results in a new tab. As an Amazon Associate I earn from qualifying purchases.