
Mirror Switch
- Make
- Rover
- Model
- 600 Rover 600 Repair Manual - Volumes 1 and 2 - 2nd Edition
- Section
- Repairs › Mirror Switch
ElectricalMirror Switch
- Remove the switch as described under "Switch Removal".
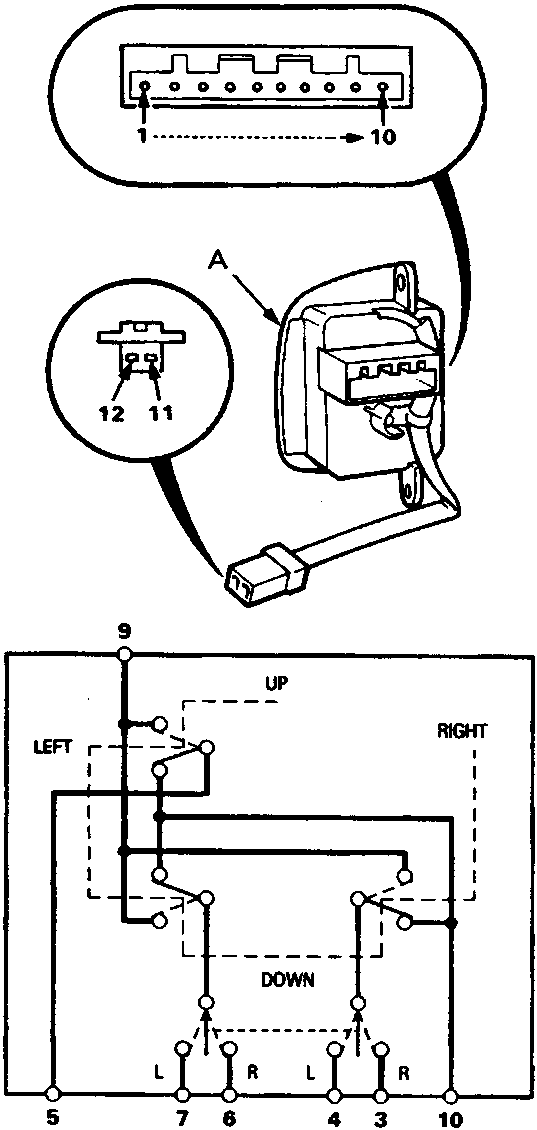
A Power mirror switch
B With demister
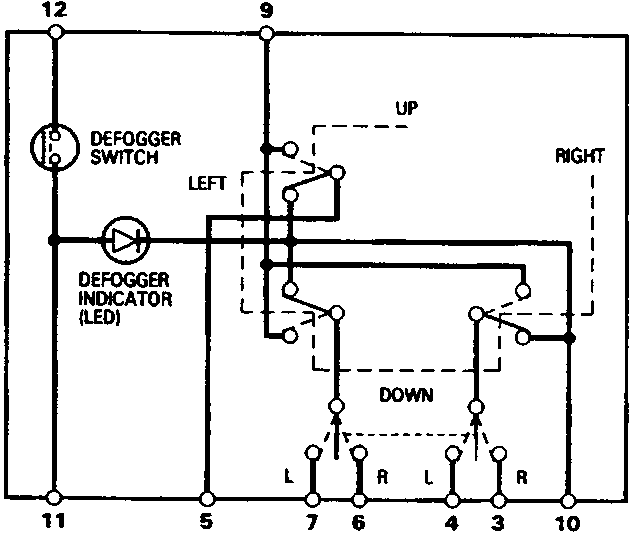
Mirror Switch
| Terminal Position | 9 | 10 | 5 | 4 | 7 | 3 | 6 |
|---|---|---|---|---|---|---|---|
| R.H. Mirror OFF | ■ | ■ | ■ | ■ | |||
| R.H. Mirror UP | ■ | ■ | ■ | ■ | |||
| R.H. Mirror DOWN | ■ | ■ | |||||
| R.H. Mirror LEFT | ■ | ■ | ■ | ||||
| R.H. Mirror RIGHT | ■ | ■ | ■ | ||||
| L.H.Mirror OFF | ■ | ■ | ■ | ■ | |||
| L.H.Mirror UP | ■ | ■ | |||||
| L.H.Mirror DOWN | ■ | ■ | |||||
| L.H.Mirror LEFT | ■ | ■ | ■ | ||||
| L.H.Mirror RIGHT | ■ | ■ | ■ |
Demister Switch
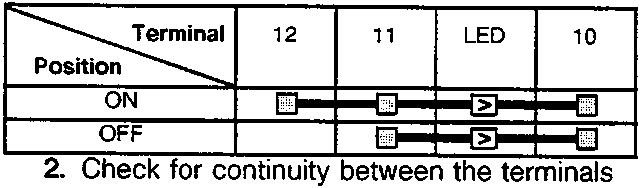
- Check for continuity between the terminals in each switch position according to the table.
Parts & tools for this job For Rover 600
- TOOLOBD2 scannerSearch: OBD2 scanner
- TOOLDigital multimeterSearch: automotive digital multimeter
- TOOLBack-probe test leadsSearch: back probe test leads
Links open Amazon search results in a new tab. As an Amazon Associate I earn from qualifying purchases.