
Demister Wires Repair
- Make
- Rover
- Model
- 600 Rover 600 Repair Manual - Volumes 1 and 2 - 2nd Edition
- Section
- Repairs › Demister Wires Repair
ElectricalDemister Wires Repair
CAUTION: Be careful not to scratch or damage the demister wires with the tester probe.
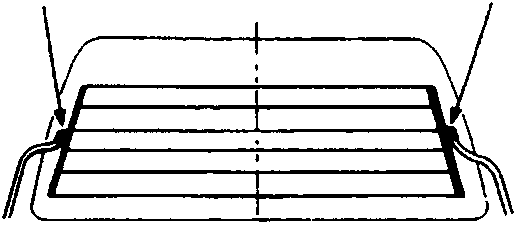
- A Positive terminal
- B Negative terminal
- Check for voltage between the positive terminal and body earth with the ignition switch and demister switch ON. There should be battery voltage.
- If there is no voltage, check for:
- faulty demister relay.
- faulty demister switch.
- an open in the BLK/GRN wire.
- If there is battery voltage, go to step 2.
- Check for continuity between the negative terminal and body earth. If there is no continuity, check for an open in the demister earth wire.
- Touch the voltmeter positive probe to the halfway point of each demister wire and the negative probe to the negative terminal. There should be approximately 6 V with the ignition switch and demister switch ON.
- If the voltage is as specified, the demister wire is OK.
- If the voltage is not as specified, repair the demister.
- If it is more than 6 V, repair the wire half on the negative side.
- If it is less than 6 V, repair the wire half on the positive side.
Demister Wires Repair
Note: To make an effective repair, the broken section must be no longer than one inch.
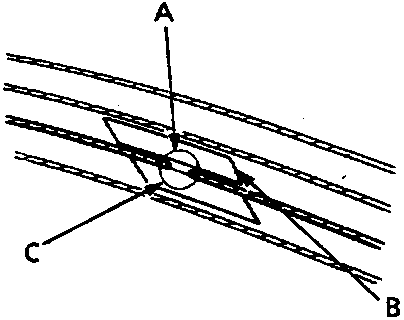
- A Break
- B Cellophane tape
- C Broken portion
- Lightly rub the area around the break with fine steel wool, then clean with alcohol.
- Carefully mask above and below the broken portion of the demister wire with cellophane tape.
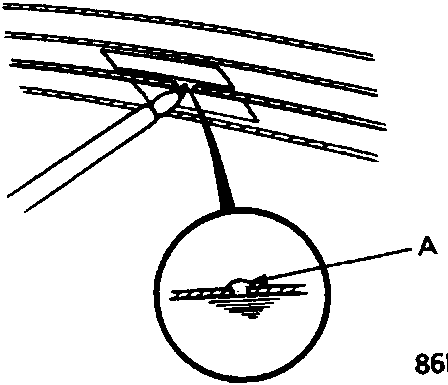
- A Paint
- Using a small brush, apply a heavy coat of silver conductive paint extending about 1/8" on both sides of the break. Allow 30 minutes to dry.
Note: Thoroughly mix the paint before use.
- Check for continuity in the repaired wire.
- Apply a second coat of paint in the same way. Let it dry three hours before removing the tape.
Parts & tools for this job For Rover 600
- TOOLDigital multimeterSearch: automotive digital multimeter
- PARTAssorted fuse kitSearch: car fuse assortment kit
- TOOLWire crimper and connector kitSearch: wire crimper connector kit
Links open Amazon search results in a new tab. As an Amazon Associate I earn from qualifying purchases.