
Switch Test
- Make
- Rover
- Model
- 600 Rover 600 Repair Manual - Volumes 1 and 2 - 2nd Edition
- Section
- Repairs › Switch Test
ElectricalSwitch Test
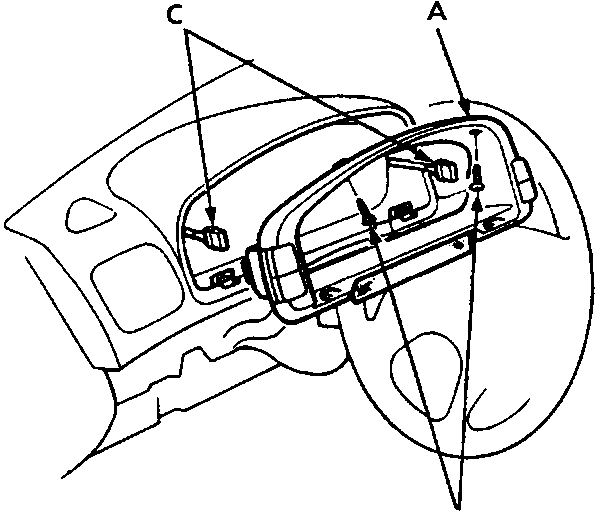
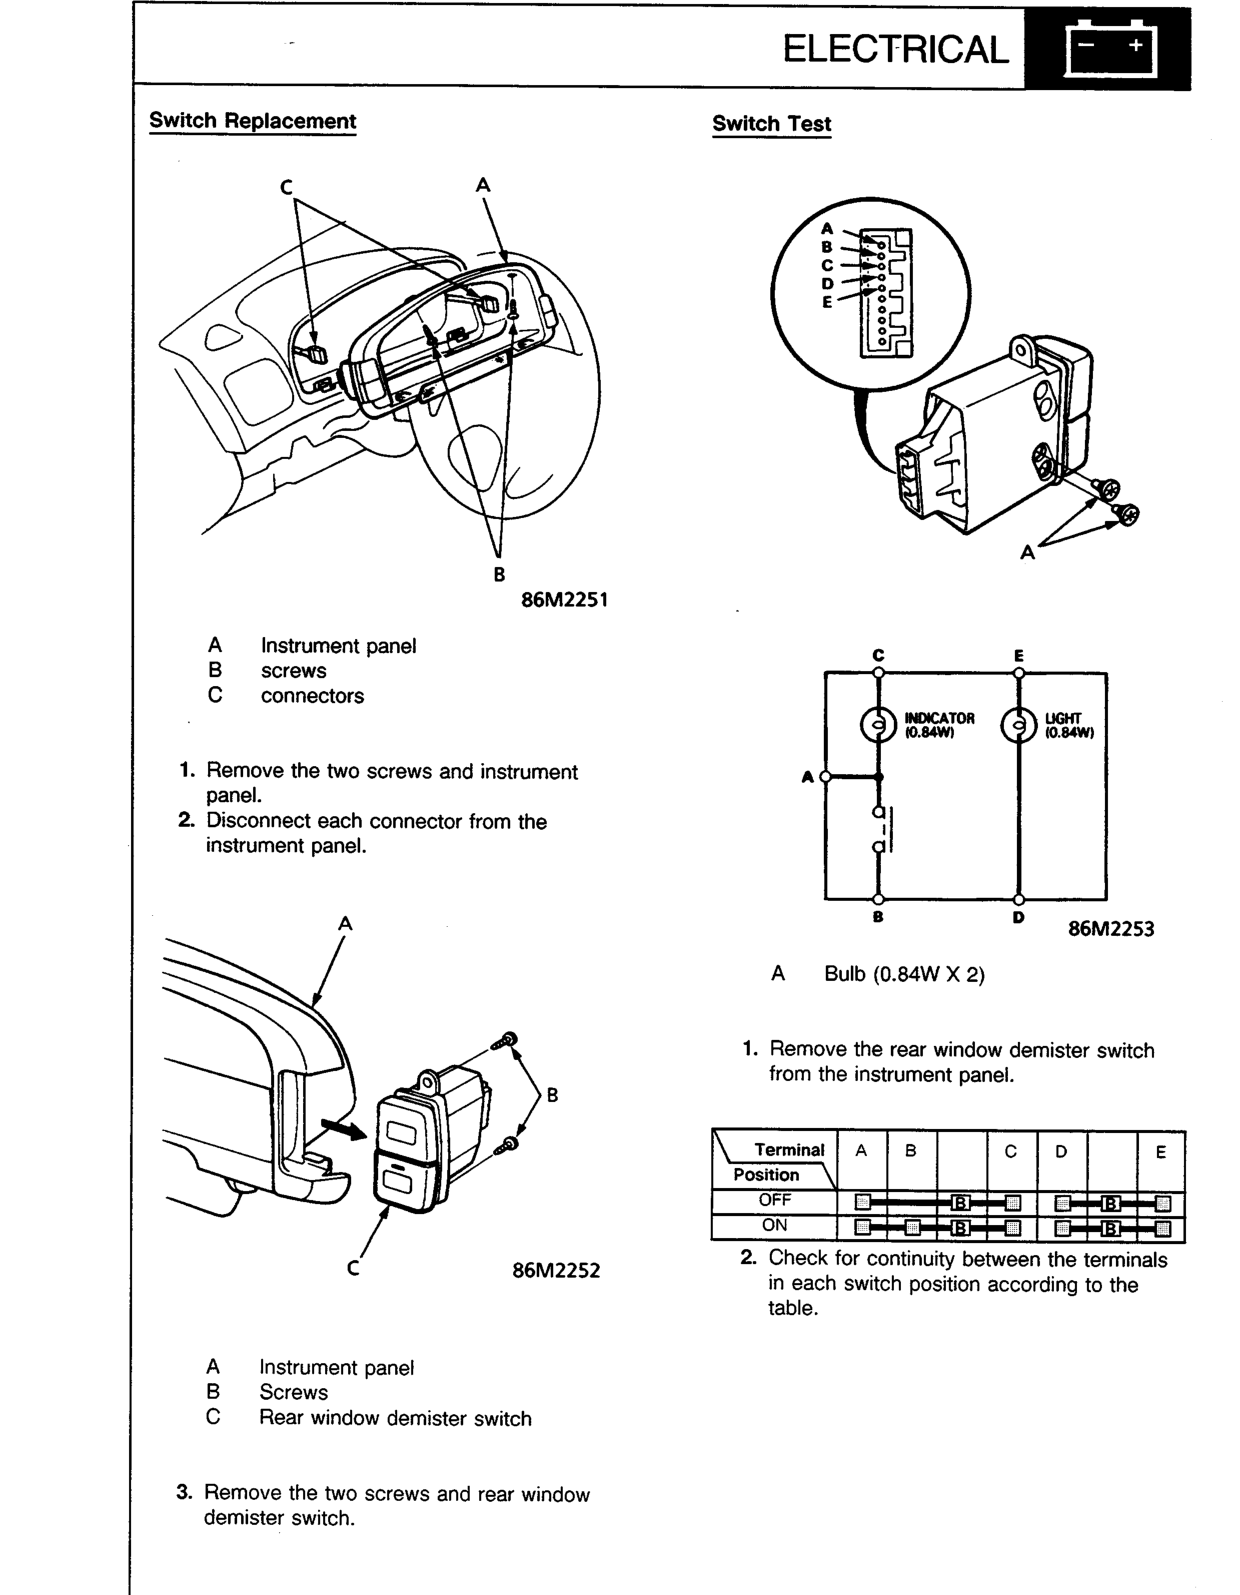
A Instrument panel
B screws
C connectors
- Remove the two screws and instrument panel.
- Disconnect each connector from the instrument panel.
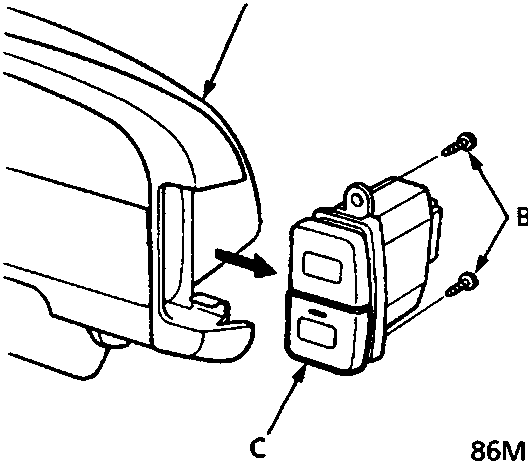
A Instrument panel
B Screws
C Rear window demister switch
- Remove the two screws and rear window demister switch.
Switch Test
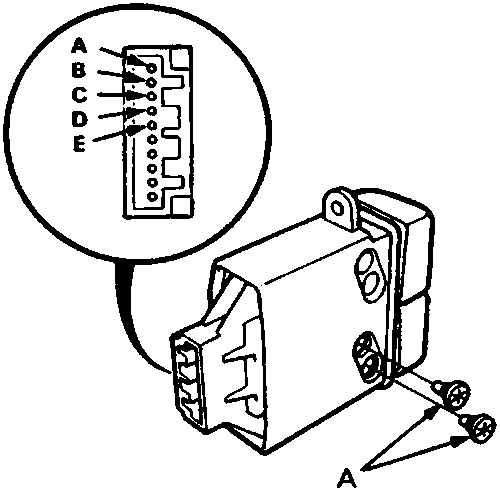
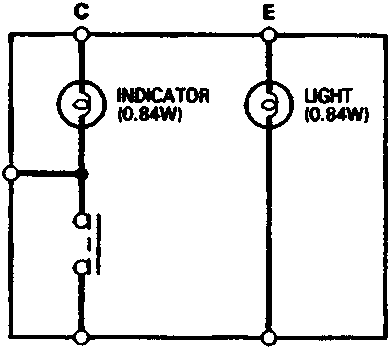
A Bulb (0.84W X 2)
- Remove the rear window demister switch from the instrument panel.
- Check for continuity between the terminals in each switch position according to the table.
| Terminal Position | A | B | C | D | E |
|---|---|---|---|---|---|
| OFF | |||||
| ON |
Original page
Parts & tools for this job For Rover 600
- TOOLOBD2 scannerSearch: OBD2 scanner
- TOOLDigital multimeterSearch: automotive digital multimeter
- TOOLBack-probe test leadsSearch: back probe test leads
Links open Amazon search results in a new tab. As an Amazon Associate I earn from qualifying purchases.