
Power Mirror Replacement
- Make
- Rover
- Model
- 600 Rover 600 Repair Manual - Volumes 1 and 2 - 2nd Edition
- Section
- Repairs › Power Mirror Replacement
ElectricalPower Mirror Replacement · page 1 of 3
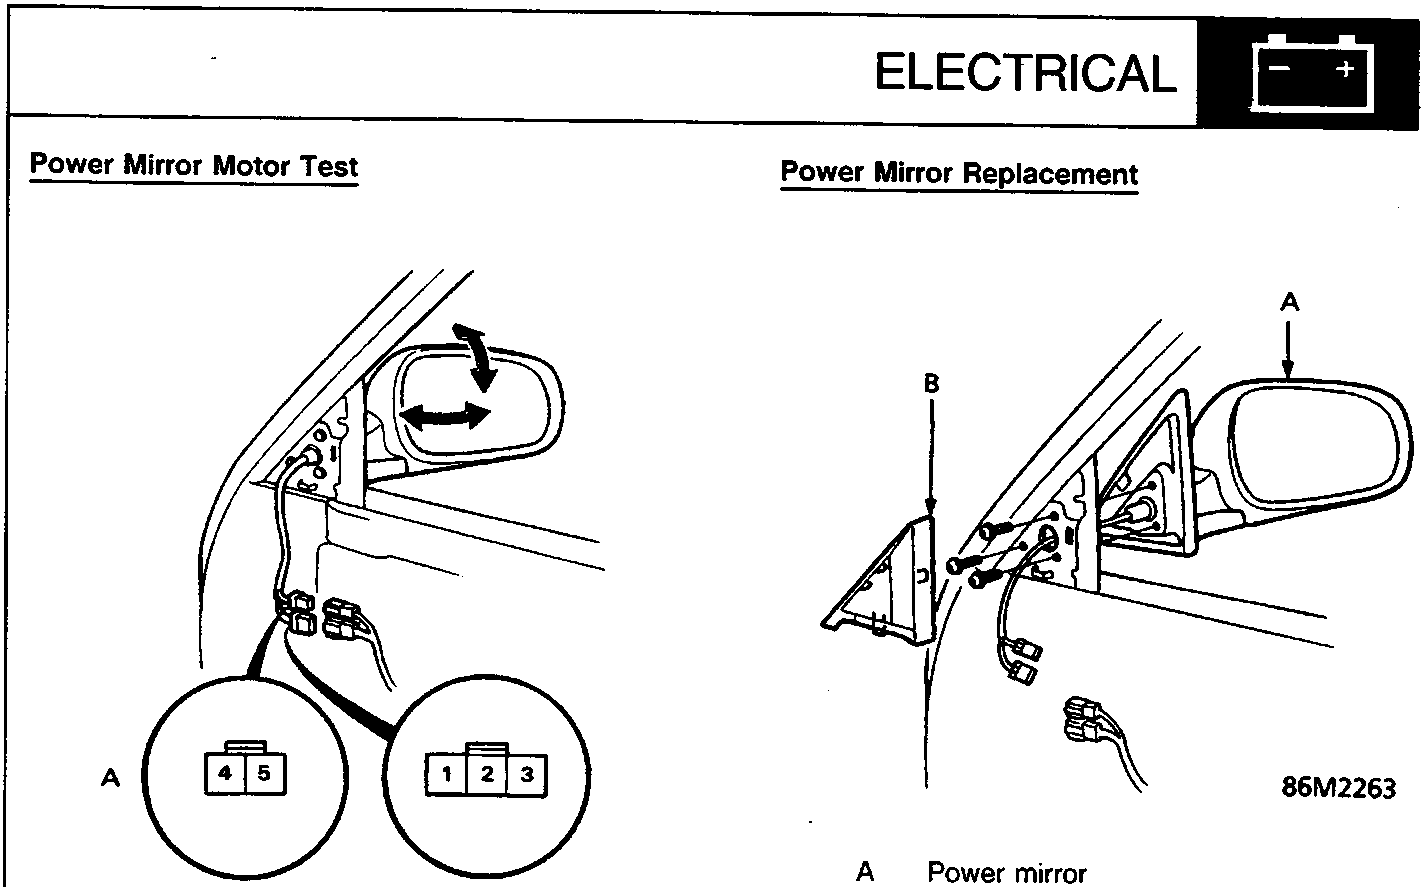
- View from wire side
- With demister
- View from wire side
- Carefully lever out the window corner panel with a flat tip screwdriver.
- Remove the door panel, see BODY.
- Disconnect the 3-P (and 2-P) connector(s) from the mirror. ( ): With demister
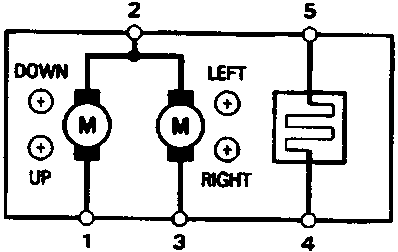
- Test the motor.
| Position | Terminal | ||
|---|---|---|---|
| 1 | 2 | 3 | |
| TILT UP | + | - | |
| TILT DOWN | + | - | |
| SWING LEFT | + | - | |
| SWING RIGHT | - | + | |
- Check for continuity between the No. 5 and No. 4 terminals (R x 10³ scale). There should be continuity.
Power Mirror Replacement
Note: Before removing the mirror, lower the window fully.
- Carefully lever out the window corner panel with a flat tip screwdriver.
- Remove the door panel.
- Disconnect the 3-P (and 2-P) connector(s) from the mirror.
- While holding the mirror with one hand, remove the three mounting screws with the other and replace the mirror. ( ): With demister
Parts & tools for this job For Rover 600
- TOOLTrim removal tool kitSearch: trim removal tool kit
- PARTTouch-up paintSearch: Rover touch up paint
- PARTPanel clip assortmentSearch: Rover panel clips assortment
Links open Amazon search results in a new tab. As an Amazon Associate I earn from qualifying purchases.