
Starter Replacement (page 2 of 5)
- Make
- Rover
- Model
- 600 Rover 600 Repair Manual - Volumes 1 and 2 - 2nd Edition
- Section
- Repairs
ElectricalStarter Replacement · page 2 of 5
M/T:
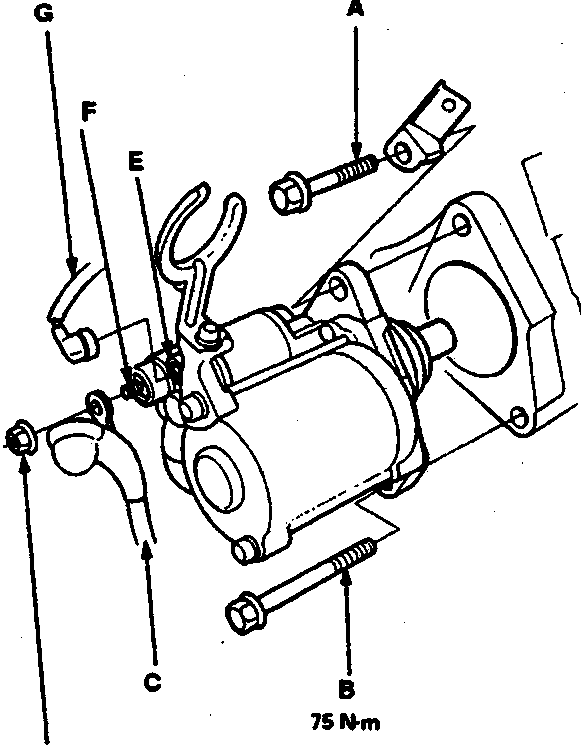
45 N·m
75 N·m
9 N·m
- A Mounting bolt
- B Mounting bolt
- C Starter cable
- D Mounting nut
- E S terminal
- F B terminal
- G BLK/WHT wire
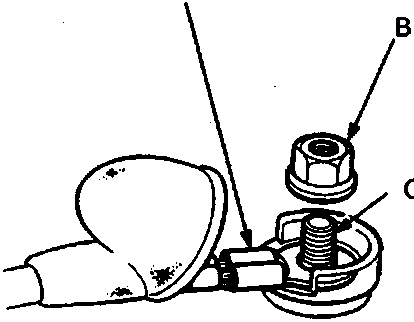
- A Crimped side of ring terminal
- B Nut
- C Terminal
Note: When installing the starter cable, make sure that the crimped side of the ring terminal is facing out.
- Disconnect the starter cable from the B terminal on the solenoid by removing the mounting nut, and disconnect the BLK/WHT wire from the S terminal.
Note: In case of an A/T model, the starter cable also has to be removed from the bracket on the transmission housing.
- Remove the two mounting bolts holding the starter, then remove the starter motor.
- Install in the reverse order of removal.
Parts & tools for this job For Rover 600
- TOOLBattery testerSearch: car battery tester
- TOOLDigital multimeterSearch: automotive digital multimeter
- TOOLBattery terminal cleanerSearch: battery terminal cleaner
Links open Amazon search results in a new tab. As an Amazon Associate I earn from qualifying purchases.