
Dim-dip Headlight Control Input Test (KE) (page 4 of 5)
- Make
- Rover
- Model
- 600 Rover 600 Repair Manual - Volumes 1 and 2 - 2nd Edition
- Section
- Repairs
ElectricalDim-dip Headlight Control Input Test (KE) · page 4 of 5
CAUTION:
- All SRS electrical wiring harnesses are covered with yellow outer insulation.
- Replace the entire affected SRS harness assembly if it has an open circuit or damaged wiring.
- Before disconnecting the SRS wiring harness, turn the ignition switch off, disconnect the negative and positive battery cables, and wait at least three minutes.
Note: LHD type is shown, RHD type is similar.
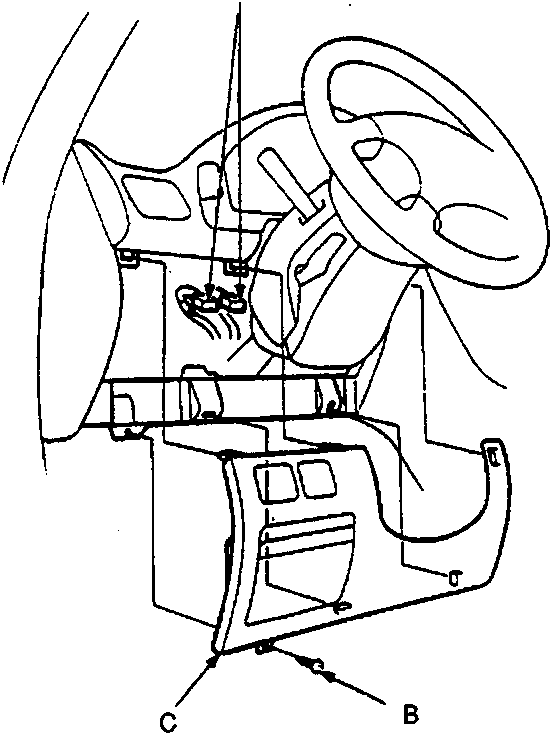
A Connector(s)
B Screw
C Dashboard lower cover
- Remove the screw and dashboard lower cover, then disconnect the connector(s) from the switch(es).
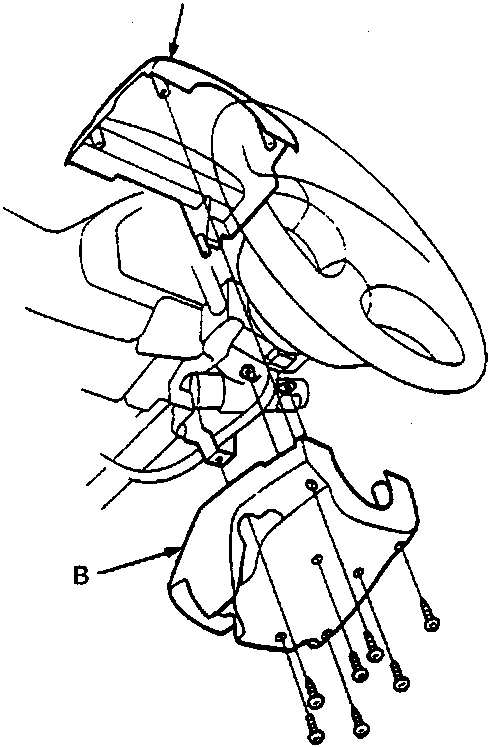
A Upper column cover
B Lower column cover
- Remove the steering column covers.
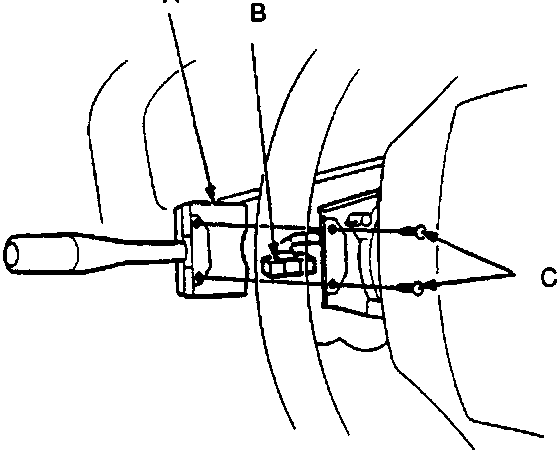
A Combination light switch
B 14 – P connector
C Screws
Parts & tools for this job For Rover 600
- PARTReplacement bulbsSearch: Rover 600 bulbs
- TOOLDigital multimeterSearch: automotive digital multimeter
Links open Amazon search results in a new tab. As an Amazon Associate I earn from qualifying purchases.